I have twelve weeks to pick my African violet show plants for MAAVS, and I’ve already changed my mind three times. Anyone else relate?
I’ll be showing violets for the first time at the Mid-Atlantic African Violet Society (MAAVS) show in York, Pennsylvania this November. And now is the time to begin preparations…starting with choosing your plants. If you’ve ever stared at your whole African violet collection trying to figure out which one is “show material,” you already know it’s not as simple as picking your prettiest plant. There’s a real process behind choosing an African violet show plant — one that starts weeks, not days, before the show itself. With the Mid-Atlantic African Violet Society show landing on November 5th and 7th, August 13th marked my twelve-week mark, which means it’s decision time. Here’s exactly how I narrowed down my candidates, so if you’ve got a show on your calendar too, you can walk through the same process with me.
Why Twelve Weeks Matters
African violets don’t hit peak form overnight. Leaves need time to fill in evenly, damaged foliage needs time to be replaced with new growth, and bloom cycles need to be timed carefully so your plant peaks on the actual show date — not two weeks before it…or after it. Starting the selection process this early gives me room to correct small issues before they become disqualifying ones.
Symmetry
Before a judge even looks at the blooms, they’re looking at the shape. A show-quality African violet plant should form an even, flat, spiraled rosette — no gaps, no leaves sticking out further than their neighbors, no obvious lean to one side.
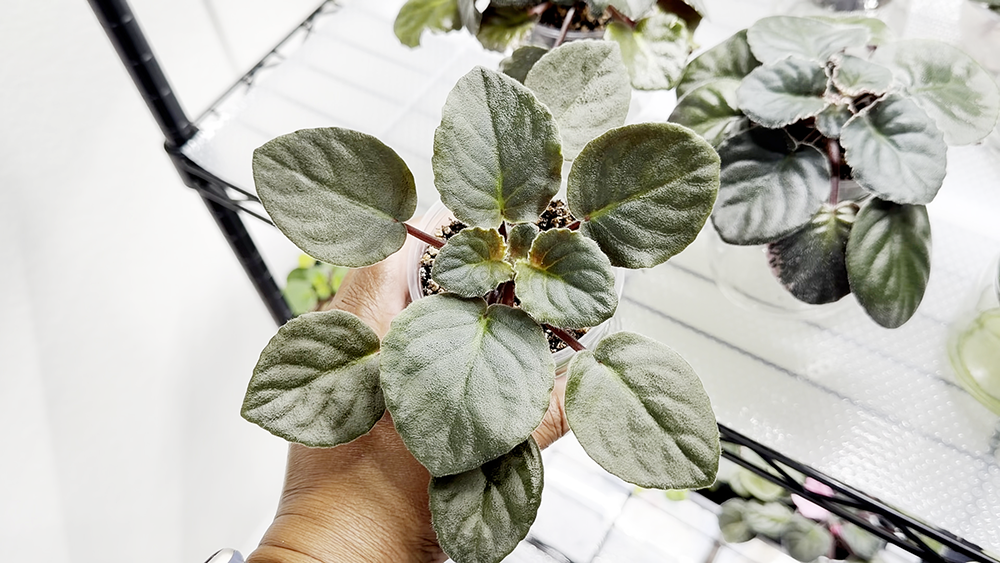
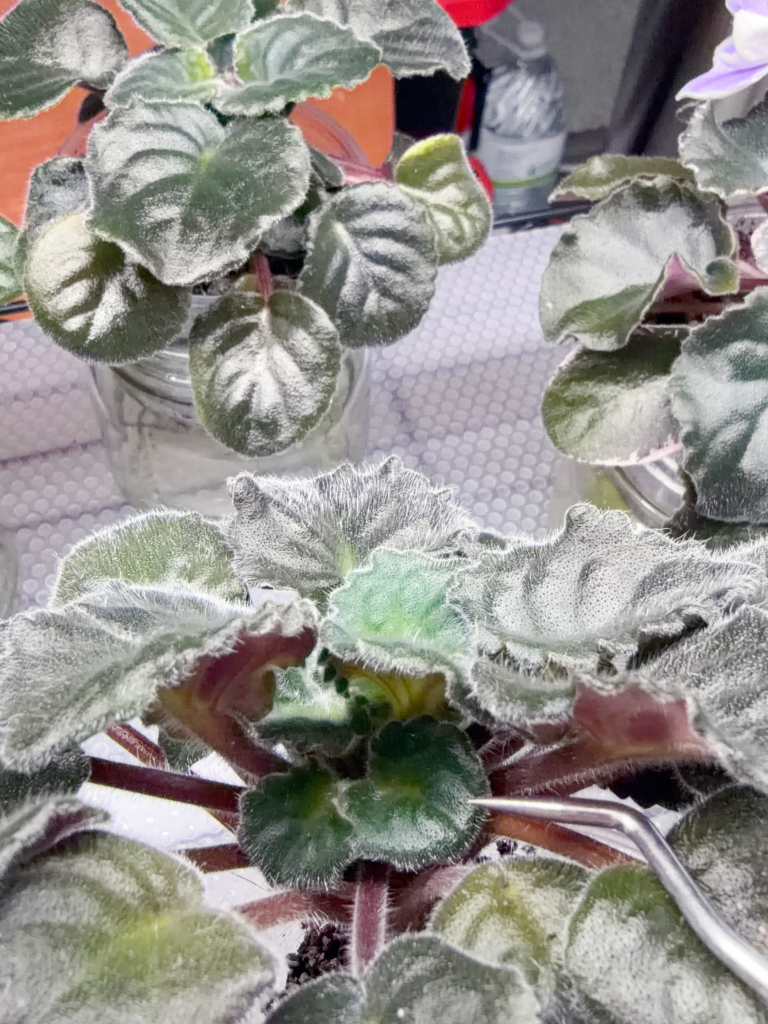
This is Stargate, one of the candidates I’ve choosen.
Nothing looks perfectly symmetrical this far out, and that’s fine. What I’m actually evaluating right now is the plant’s “bones” — is the growth pattern even? Are the leaves roughly proportional as they spiral out from the center? Small imperfections are fixable between now and show day. Uneven growth habits generally aren’t. In some cases, it’s about picking the right variety. There are some cultivars that naturally grow a bit more unruly and some that are practically bred for showing. And you’ll often see the latter varieties on the show table with blue ribbons. As much as I love my wild, weirdo varieties, those will be the ones that I’ll be keeping home.
PRO TIP: Rotate your African violets a quarter turn every time you water them. It’s a small habit that helps prevent the lopsided, reaching-toward-the-light look that can throw off symmetry over time.
Bloom Timing
This is the issue that I hear most about at my violet club meetings. A plant blooming beautifully today might be tired and past its prime by November. Meanwhile, a plant just starting to push new buds now might hit ideal, full bloom right on show day…or not.
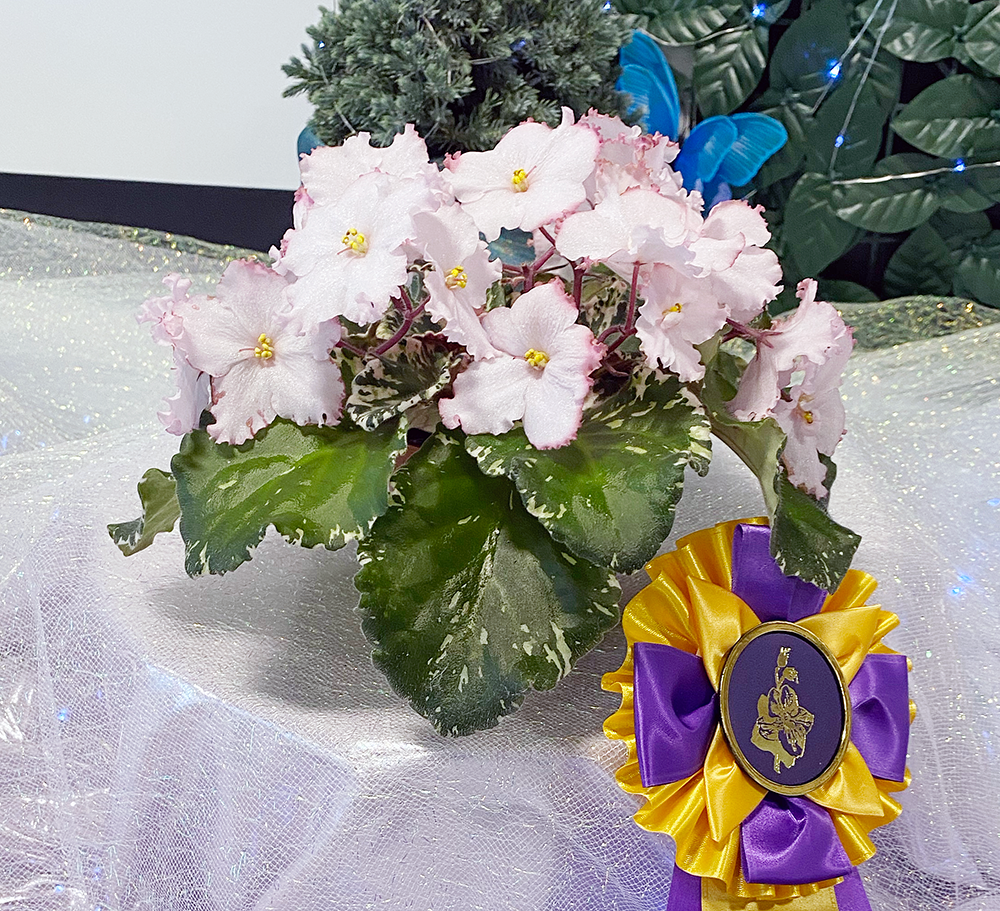
This is Willodene one of the winners from my club’s 2025 shows
Choosing an African violet show plant means doing a little backward math: where is this plant in its bloom cycle, and will that cycle line up with the show date twelve weeks from now? It’s part science, part educated guess, which is exactly why this selection process starts so early.
Foliage Health
Judges are scoring clean, healthy leaves — no yellowing, no spotting, no watering or pest damage. Of all the show categories, this is the one most within your control between now and the big day.
I’m prioritizing candidates whose outer leaves are already strong and whose center growth is tight and healthy. A plant that’s already dealing with a lot of leaf damage is starting from behind, and twelve weeks isn’t always enough time to fully turn that around.
Growth Stage
The last piece ties everything together — not just where a plant is today, but where it’ll be on show day. A plant that’s too young may not fill out in time. One that’s already mature might peak too early and start declining before judging even happens.
The ideal African violet show plant candidate has enough maturity to have real presence, with enough growing left in it that show week ends up being its actual best week.
1. Stripping bad leaves — anything yellowing, damaged, or past its prime comes off so the plant’s energy goes toward good new growth and so the plant can establish its symmetrical shape..
2. Checking for suckers — those small offshoots at the base compete with the main crown for energy and they throw off symmetry, so they’re getting removed.
3. Disbudding — pinching off current blooms and buds so the plant redirects its energy into a bloom cycle timed for show day instead of blooming itself out early.
4. Repotting — fresh soil and a properly sized pot give the plant room to fill out symmetrically over the next twelve weeks.
On the bright side: stripping off those leaves and suckers makes more propagation material for me as well!
Conclusion
Choosing an African violet show plant isn’t about picking your prettiest bloom today — it’s about picking the plant with the best shot at peaking, symmetrically and beautifully, exactly when it counts. I’ve got 10 candidates narrowed down, and I’ll be sharing updates as show day gets closer.
I’ll be honest, “decapitation” is a dramatic word for what is actually a pretty gentle rescue technique. But that’s exactly what African violet growers call it, and the first time I tried it, my hands were shaking a little too. If you’ve got a violet with a long, twisted neck, or one that’s really struggling with root rot, this is a technique worth having in your back pocket.
What is Decapitation, Exactly?
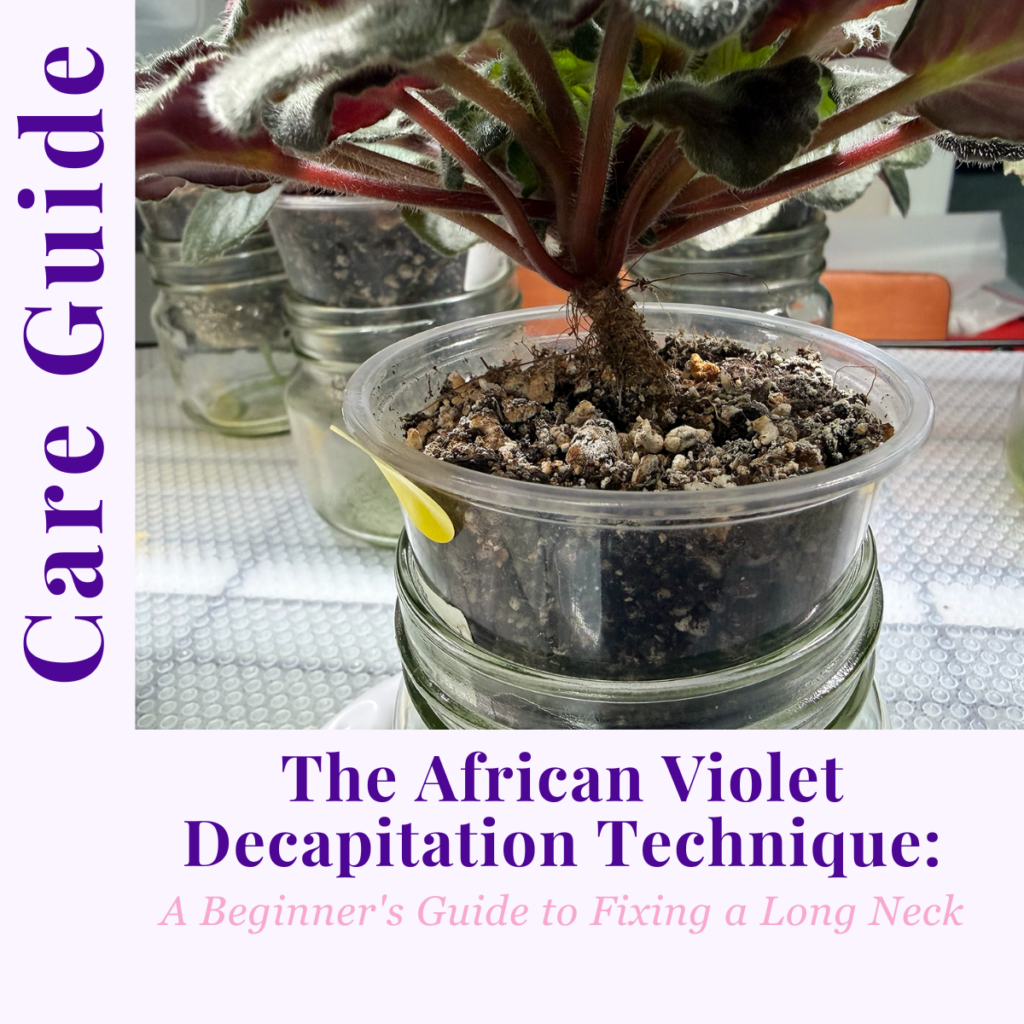
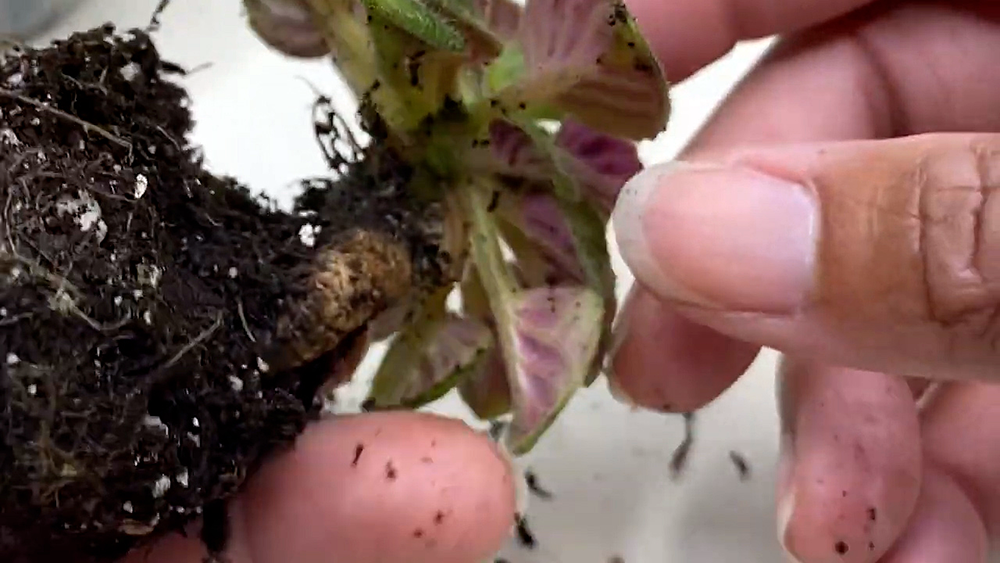
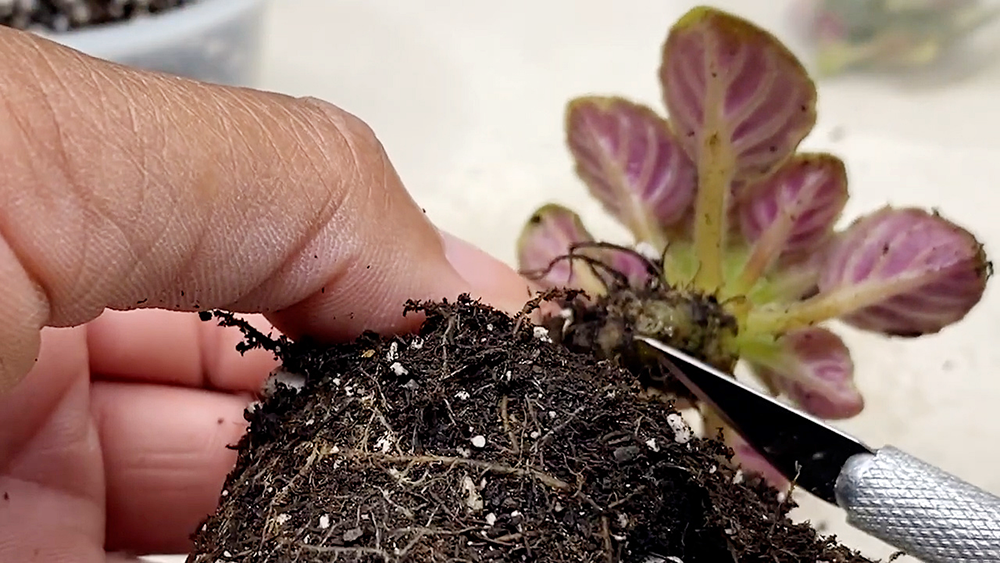
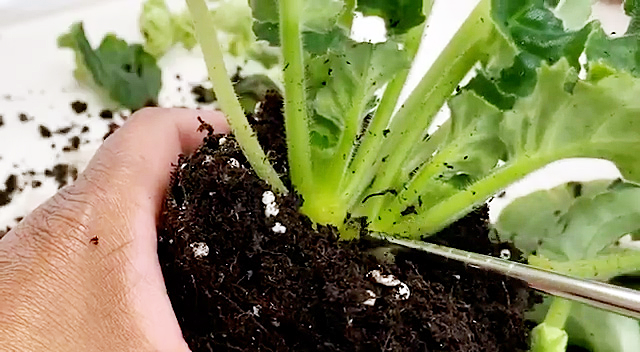
Over time, as the lower leaves on an African violet naturally drop off, more of the stem becomes exposed. That exposed stem is called the “neck”. On older plants it can grow long, curved, or twisted. Decapitation means cutting off that stem, along with the old root system attached to it, and repotting just the top crown of the plant. This way, the plant will grow an entirely new, fresh root system right from the base of the remaining stem.
It sounds intense, and it kind of is. But it works because it forces the plant to stop trying to maintain old, tired roots and put all of its energy into building new ones instead. And it will also prevent those older roots from rotting and transferring the rot to the rest of the plant.
When You’d Actually Use This
There are two main scenarios where decapitation makes sense:
A long or twisted neck. If your violet’s neck has gotten so long or curved that it’s becoming difficult to pot normally, cutting it back and letting the plant regrow roots can straighten things out and make it manageable again.
Severe root rot. If the roots are largely dead but there’s still a healthy green stem left, decapitation can be a last-ditch way to save the plant. You cut away the rotted section, keep the healthy green stem, and let it regrow roots from scratch.
Some growers also do this proactively on violets that came from another collection, as a way to avoid bringing in soil-based pests along with the old root ball, or on older plants that just seem to be losing vigor.
How to Do It
Start with a clean, sharp blade. A fresh X-Acto knife blade, a razor blade or a sharp knife makes a much cleaner cut than a dull one, and a clean cut matters here.
Before you cut, reduce what the plant has to maintain. Remove any blooms, flower buds, and a reasonable number of older leaves if any. The goal is to minimize how much energy the plant has to spend once it’s focused on growing new roots. Don’t go overboard, though; you still want enough leaves left for the plant to photosynthesize and support itself.
Choose where to cut. You’re aiming to cut back the exposed neck to a length that will comfortably sit in a small pot, while removing the old root ball entirely. Make the cut while the stem is still green.
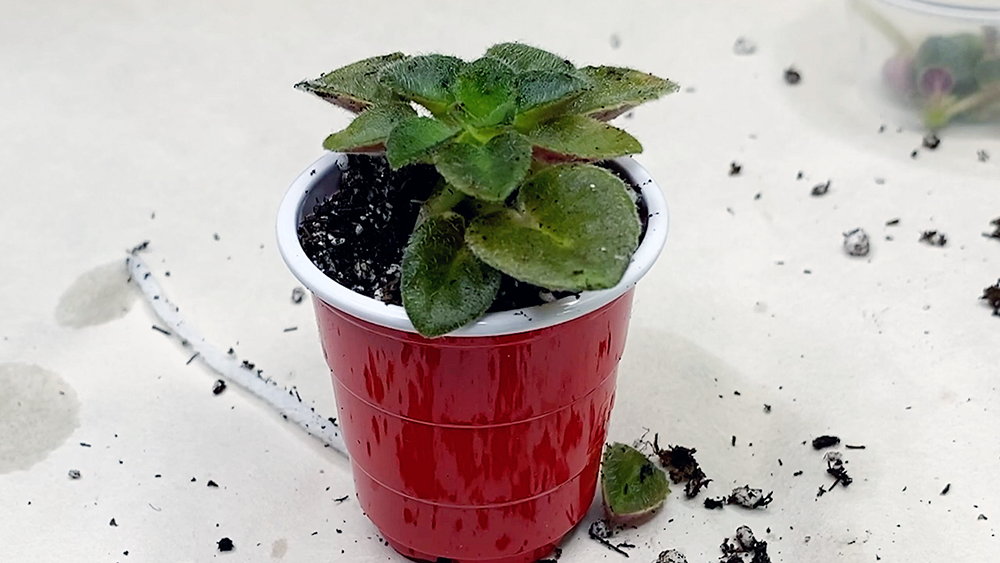
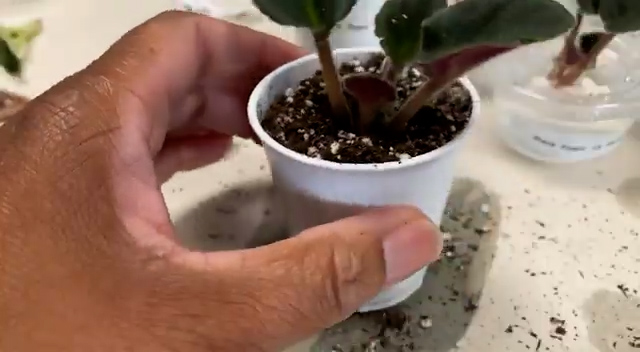
Repot immediately. Use a small container, sized for the amount of plant you have left, not the size you’ll eventually want to grow into. A pot that’s too big holds too much damp soil around a rootless stem, which invites rot. Add a little fresh potting soil with systemic insect control mixed in, and settle the stem into the soil.
Water and bag it. Water with a lightly fertilized, calcium and magnesium supplemented solution if you have it, then place the whole pot in a plastic bag to hold in humidity while new roots establish.
Before you make the cut, take a few leaves off the plant to propagate separately as backup. Decapitation doesn’t have a 100% success rate, and having a couple of leaves rooting on the side means you won’t walk away empty-handed even if the main plant doesn’t make it.
PRO TIP: I’ve also had some success rooting the decapitated crown in water and allowing it to grow roots first before transferring to soil. I usually do this for plants that have had severe root rot that I’m nervous about returning to a high humidity environment, which can help accelerate any unseen rot that hasn’t been removed. Strangely enough, submerging a plant stem in water doesn’t seem to invite as much rot as damp soil does. Just be sure to use distilled water when trying this process.
What to Expect Afterward
Keep the plant bagged and under your regular lights, checking in periodically. Within a few weeks you should start to see small new roots forming right at the base of the cut stem. Resist the urge to dig around and check too often, a gentle tug now and then to feel for resistance is enough to confirm progress without disturbing what’s developing.
Plan to keep the plant bagged for about a month, sometimes longer. When it’s time to bring it back out into your regular humidity, do it gradually: open the bag partway for a few days first, rather than removing the plant all at once, to avoid stressing it.
If successful, you should start seeing solid new growth. Once the plant is settled, you can repot it into its more permanent container, removing the old wick and refreshing the soil at the same time. Taking the plant out of the pot will give you the chance to check the new root ball, which should contain lots of nice healthy white roots. Give the plant a little cleanup while you’re at it and remove any older, tired-looking bottom leaves.
Is It Risky? Yes. Is It Worth it? Often
This isn’t a guaranteed fix, and some plants do react badly to being cut back this hard. But for a violet with a genuinely unmanageable neck, or one that’s already circling the drain from root rot, it’s often a better shot than doing nothing. Once you’ve done it successfully once, it gets a lot less intimidating to try again on another plant that needs it. I’ve gone from being a nervous first timer to a seasoned veteran that regularly decapitates struggling violets during repotting sessions without a second thought.
If you’ve ever been grooming a violet and noticed a weird little cluster of leaves growing off to the side instead of in that neat circular crown, congratulations, you’ve found a sucker. And honestly? Finding one is one of my favorite surprises in this hobby, because a sucker is really just your plant offering you a free copy of itself.
I recently went through a whole batch of new violets from our club show and sale, and between the lot of them I found more suckers than I expected, including one that was nearly as big as the mother plant itself. So let’s talk about what suckers actually are, how to spot them, and what to do once you find one.
What is a Sucker?
A sucker is essentially a second plant growing off the main stem of your violet, competing for space within the same pot. African violets are supposed to grow in a single, well-defined rosette, with all the leaves radiating out from one central crown. A sucker throws that pattern off. Instead of one tidy center, you end up with two crowns tangled together, or a cluster of leaves growing sideways, upside down, or in a completely different direction than the rest of the plant.
The one exception to this are trailing African violets whose natural growth pattern includes multiple crowns that allows the violet to trail in a bushy or elongated fashion instead of the familiar rosette shape. But that’s a story for another day.
Sometimes suckers stay small and easy to miss. Other times, if they’ve been growing undetected for a while, they get big enough to basically become their own plant while still attached to the mother.
How to Spot One
The biggest giveaway is direction. Healthy leaves grow outward from a central crown in a neat rosette. A sucker’s leaves grow off to the side, at an angle, or even upside down relative to the rest of the plant. If you look at the stems instead of just the leaves, you’ll often be able to trace two separate growth centers once you know what you’re looking for.
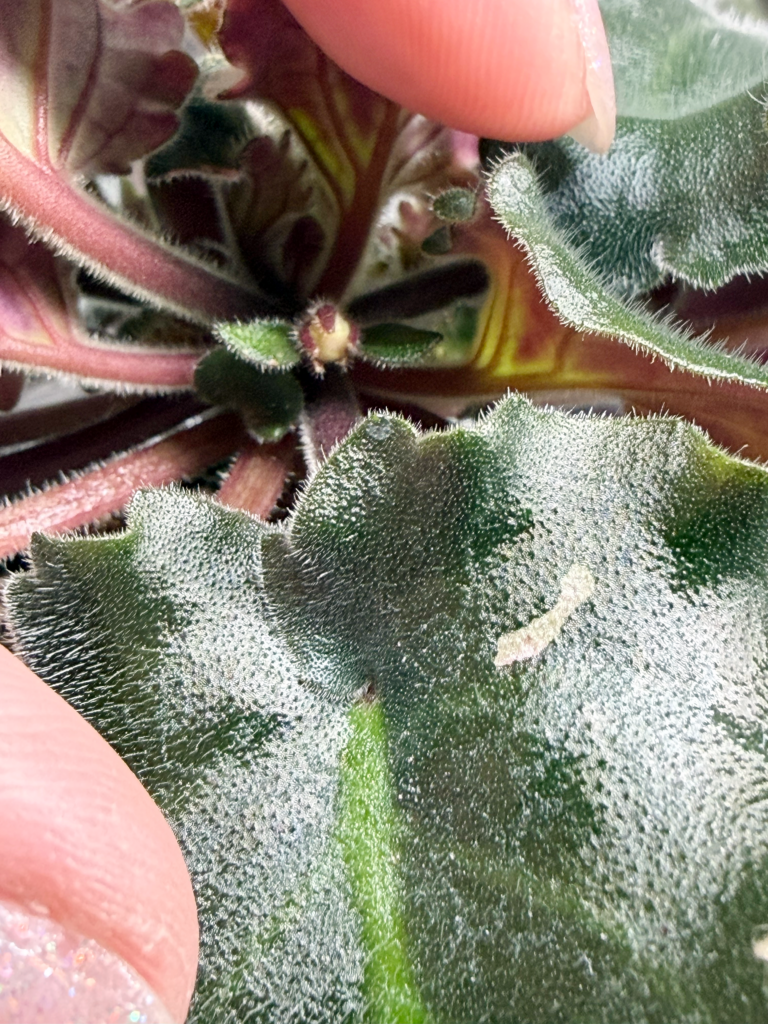
The horizontal leaves are a sucker. The center contains more tiny leaves.
Another thing to watch is that sometimes flower buds look a little like suckers in their beginning stage as many flower buds also have tiny leaves surrounding the developing bud. The giveaway here is to see if those leaves have a bud at the center. That means it’s a flower bud, not a sucker.
This is a flower bud, not a sucker. Note the bud at the center of the leaves.
It takes a little practice to tell which leaves belong to the main plant and which belong to the sucker, and honestly, sometimes it really is guesswork until you start gently separating things and see how they move.
Should You Remove It?
You don’t have to. If you’re not ready to attempt separating one, it’s completely fine to leave a sucker in place, though it will eventually compete with the main plant for space, light, and nutrients, and your violet will lose that classic single-crown shape.
This is an example of a massive sucker (the plant on the right) that is as big as the mother plant.
If you do want to remove it, you have two options depending on the size: smaller suckers can often just be gently pulled or teased away from the main stem. Larger ones usually need a clean cut with a sterilized knife or scalpel, made as close to the main stem as possible. Either way, expect to break a leaf or two in the process. That’s completely normal and not something to stress over.
If the sucker has any roots of its own, try to keep as many as possible attached when you separate it, since that gives it a head start. If it doesn’t have roots yet, don’t worry, you have a couple of good options for growing some.
Two Ways to Root a Sucker
Directly in soil. Pot the sucker up just like you would any new plantlet, using a small container rather than a large one. This is important: too much damp soil around a rootless sucker is a fast track to rot.
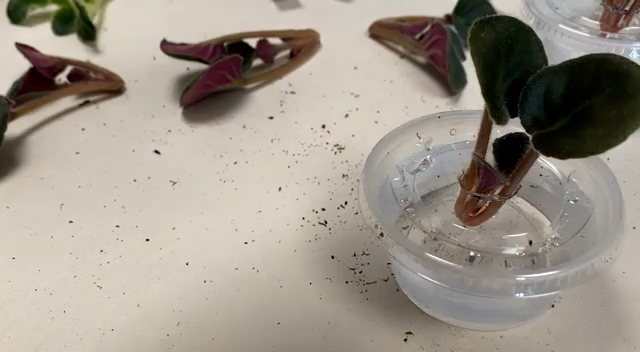
In water first. Root the sucker in distilled water before potting it up in soil. A small container with a lid works well here, poke a hole just big enough to hold the sucker without letting leaves dip into the water, which can cause rot. Expect to wait a few weeks to a month before real roots start forming. This method takes longer, but it lets you see exactly when roots are developing rather than guessing, and it tends to be a little more forgiving against rot.
PRO TIP: Once your sucker actually has roots, whether from soil or water rooting, add a systemic insect control to the soil. It won’t do much good before roots exist to absorb it, but once roots are growing, it helps protect your new plant from pests right from the start.
Planting a sucker after rooting in water.
Why Bother With Suckers at All?
Because they’re basically free propagation without much effort on your part. Out of one recent cleanup session, I pulled multiple suckers off a single plant and ended up with several bonus violets I didn’t have to buy, trade, or wait months to propagate from a leaf. If you enjoy growing your collection without spending more money, keeping an eye out for suckers is one of the easiest ways to do it.
Just remember: not every sucker survives being separated, and that’s okay too. Some come away with barely any crown left to work with. Consider it part of the process rather than a failure.
Curious to see this whole process in action, including the moment I found five suckers on a single plant? Head over to my YouTube channel and watch African Violet Care: Removing Bonus Plants From Your Violets. And if you’ve found a surprise sucker on one of your own violets, tell me about it in the comments, I love hearing about other people’s bonus plants!
Confession: my plant room did not look cute last week.
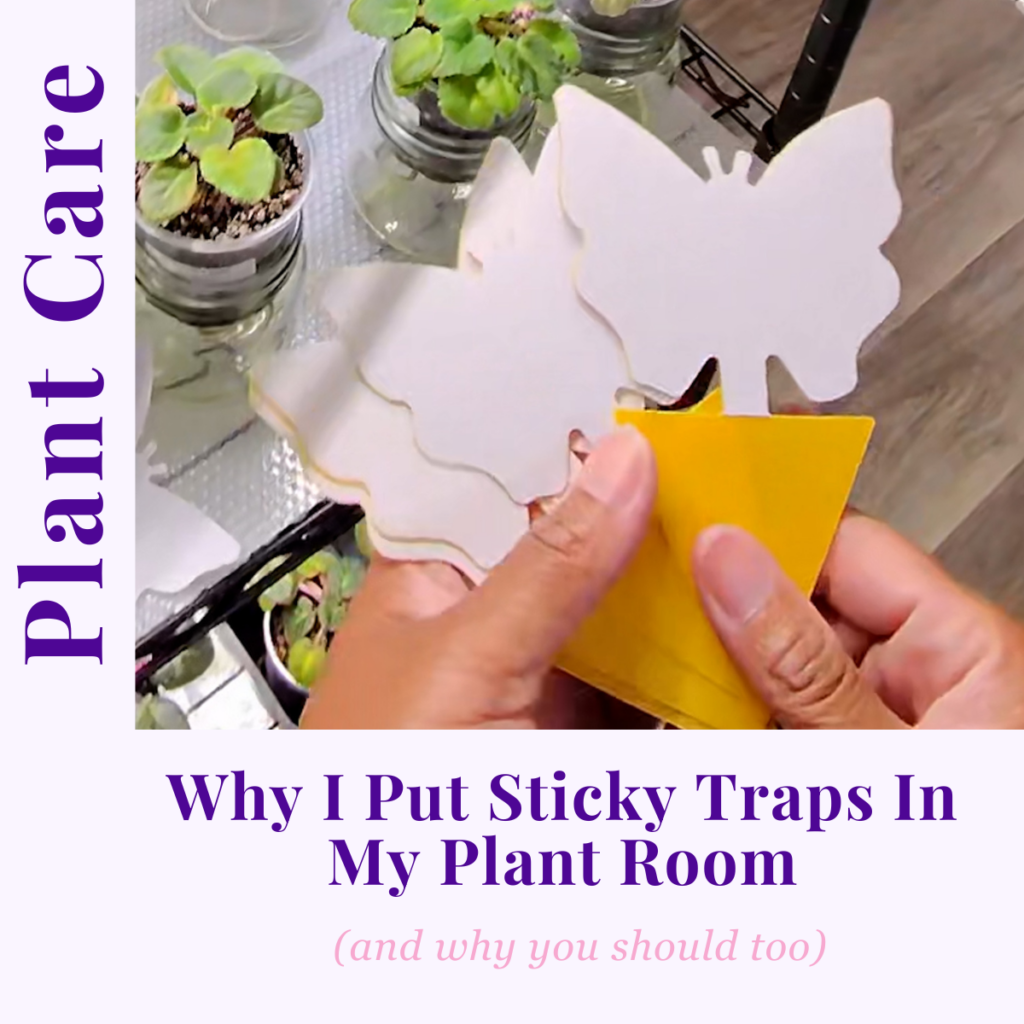
Between work, visitors, and general life chaos, I fell behind on more than just watering my AVs. Leaves needed grooming, pots needed rotating, and the entire room just needed cleaning in general. And when chores start falling by the wayside, that’s the perfect time for pests to start sneaking into your plant room. So this week, along with the rest of my plant room reset, I did something simple that made me feel a whole lot better about the state of things: I put up fresh sticky traps for my African violets.
Let’s talk about why sticky traps for African violets are one of the easiest, lowest-effort tools in my whole plant care routine — and why I don’t think I’ll ever go back to skipping them.
Why I Started Using Sticky Traps In My Plant Room
Here’s the thing about pests on AVs: by the time you can SEE a problem with your naked eye, it’s usually already a problem. Fungus gnats, whiteflies, thrips, and aphids — they’re sneaky, and violets have a way of hiding trouble under all those fuzzy leaves and underneath the soil.
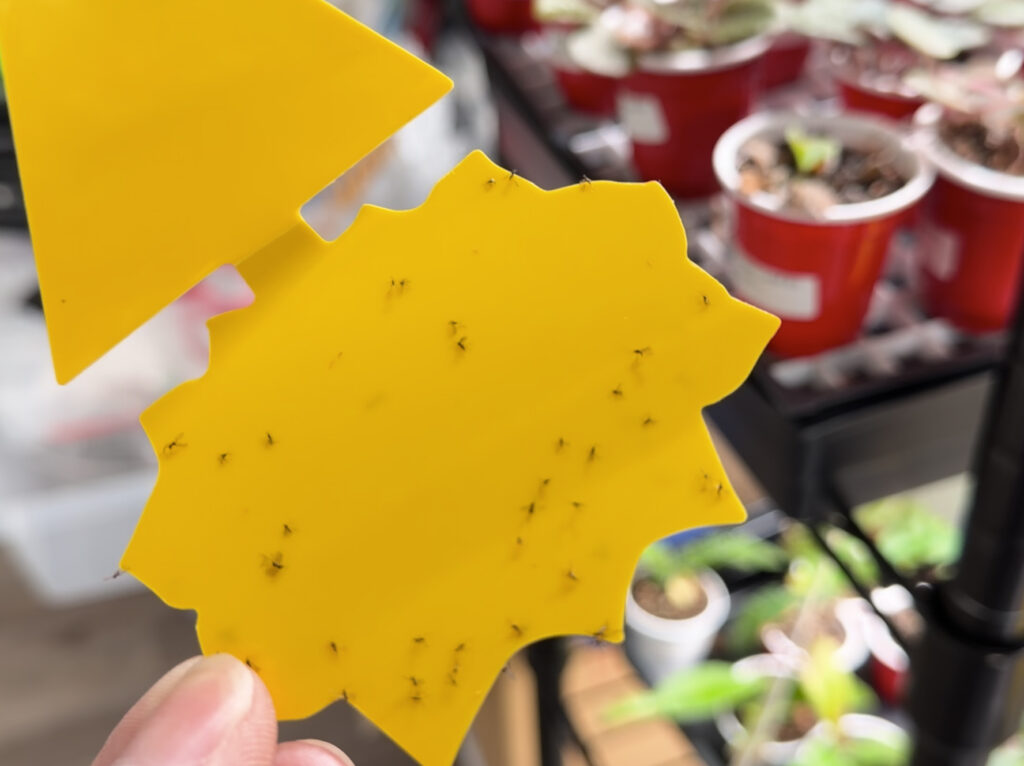
Sticky traps for African violets solve that by doing the noticing for you. They don’t discriminate, they don’t judge, they just quietly catch whatever’s flying around your plant shelves so you can see it. It’s basically a pest report card, and I need all the early warnings I can get.
What Sticky Traps Actually Do (Monitoring, not Miracle Cure)
While sticky traps are great, please don’t think a pack of them is going to solve an infestation on its own. It won’t. What it will do is tell you that you MAY have an infestation, often before it’s obvious, which honestly might be the more valuable job.
Think of them as a monitoring tool first, and a minor population control tool second. If you’re seeing a trap fill up fast with fungus gnats, that’s your cue to check your watering habits (overwatering is basically a gnat invitation), refresh your Bonide application, or look closer at your soil. If it’s whiteflies or thrips, you might need to look at a new plant you brought in recently. The trap doesn’t fix the root cause — but it absolutely points you toward it.
What I Use
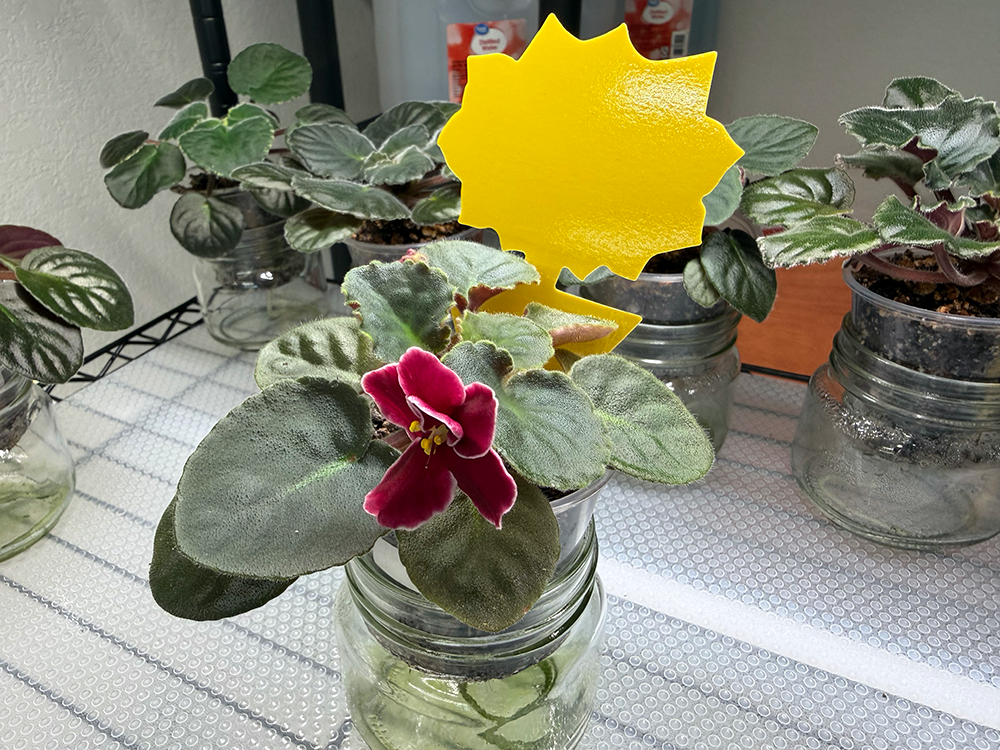
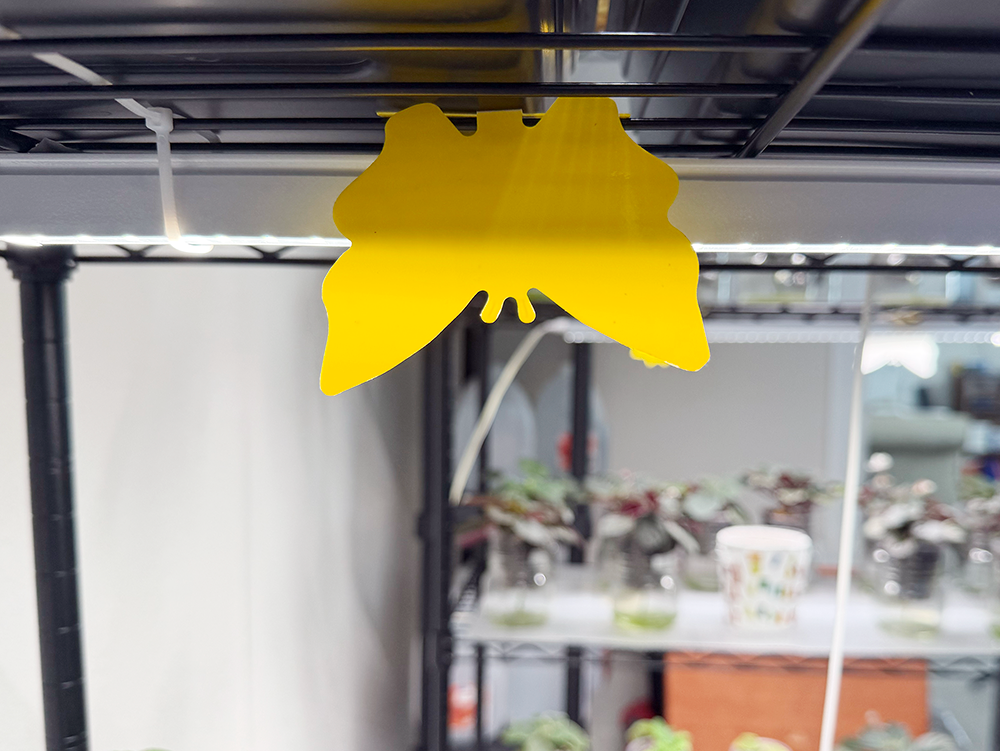
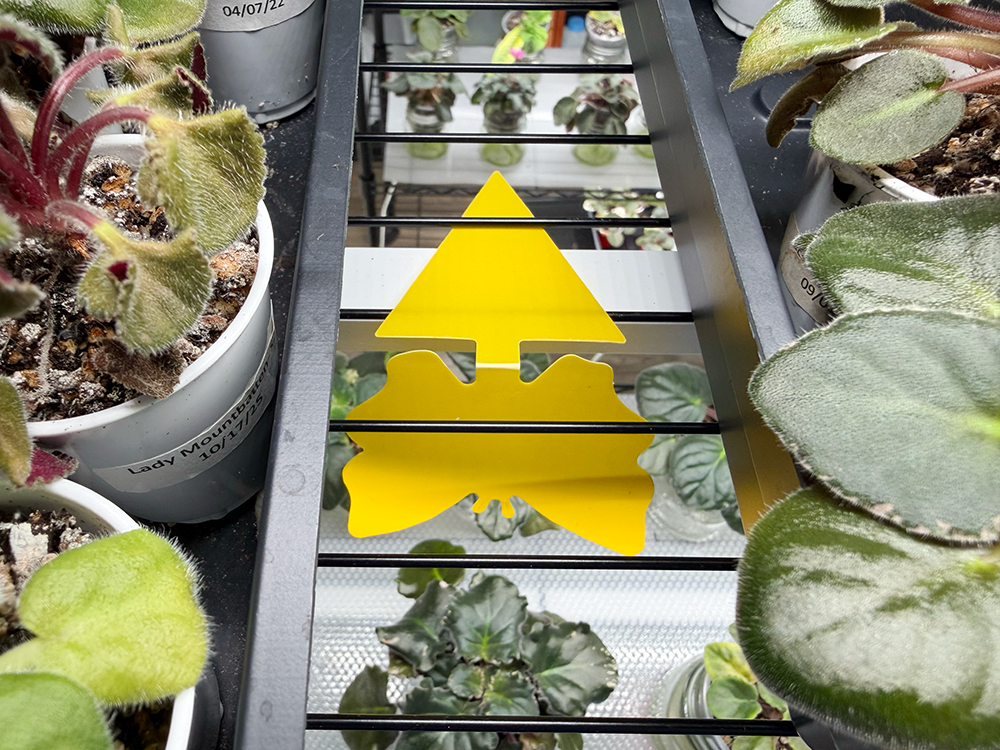
I picked up a pack of 96 yellow sticky traps for African violets on Amazon. The pack of 96 is more than enough to handle all of my racks and enough for several months of changes as well. They’re the stick-in-the-soil style — you just peel the protective film and poke the stake right down into the soil next to the plant. I’ve got way too many plants to do this, so I just slip the pointed end on the underside of my plant racks.
They’re non-toxic, no sprays, no odor, nothing I have to worry about drifting onto my violets or into the air I’m breathing while I putter around in there.
How I Use Them Without Overdoing It
If you have a lot of plants, you don’t have to put a trap in every single pot. That would be overkill, not to mention it would distract from the lovely blooms and quite possibly catch on some of the fuzzy AV leaves. Instead, space them out every few plants across a shelf. That will give you a good general read on what’s happening in that area without turning your whole collection into a sticky obstacle course. Or if you have a wire rack like I do, you can hang two or three traps from the underside of the rack.
I also try to actually look at them regularly, not just stick them in and forget about it. A trap only helps if you’re checking it — otherwise it’s just decor at that point.
Signs to Watch for on Your Traps
Once your traps are up, here’s roughly what you’re looking for:
Tiny black flying specks — likely fungus gnats, often tied to overly wet soil
Small white or pale insects — whiteflies, which love new plants and warm rooms
Winged aphids — less common indoors, but worth noting if you spot them
Nothing at all — genuinely a good sign! Keep doing what you’re doing
If you start seeing a pattern instead of just the occasional stray bug, that’s when it’s worth digging a little deeper into your care routine.
Installing and changing sticky traps for your plant room are one of those unglamorous little habits that make a real difference because they let you catch problems before they catch you off guard. If your plant room’s overdue for a reset like mine was, grabbing a pack of these is an easy place to start.
Have you used sticky traps in your own plant room? I’d love to hear what’s worked (or not worked) for you — drop a comment below! And if you want to see exactly how I set mine up, hop over to my YouTube channel for the full video.
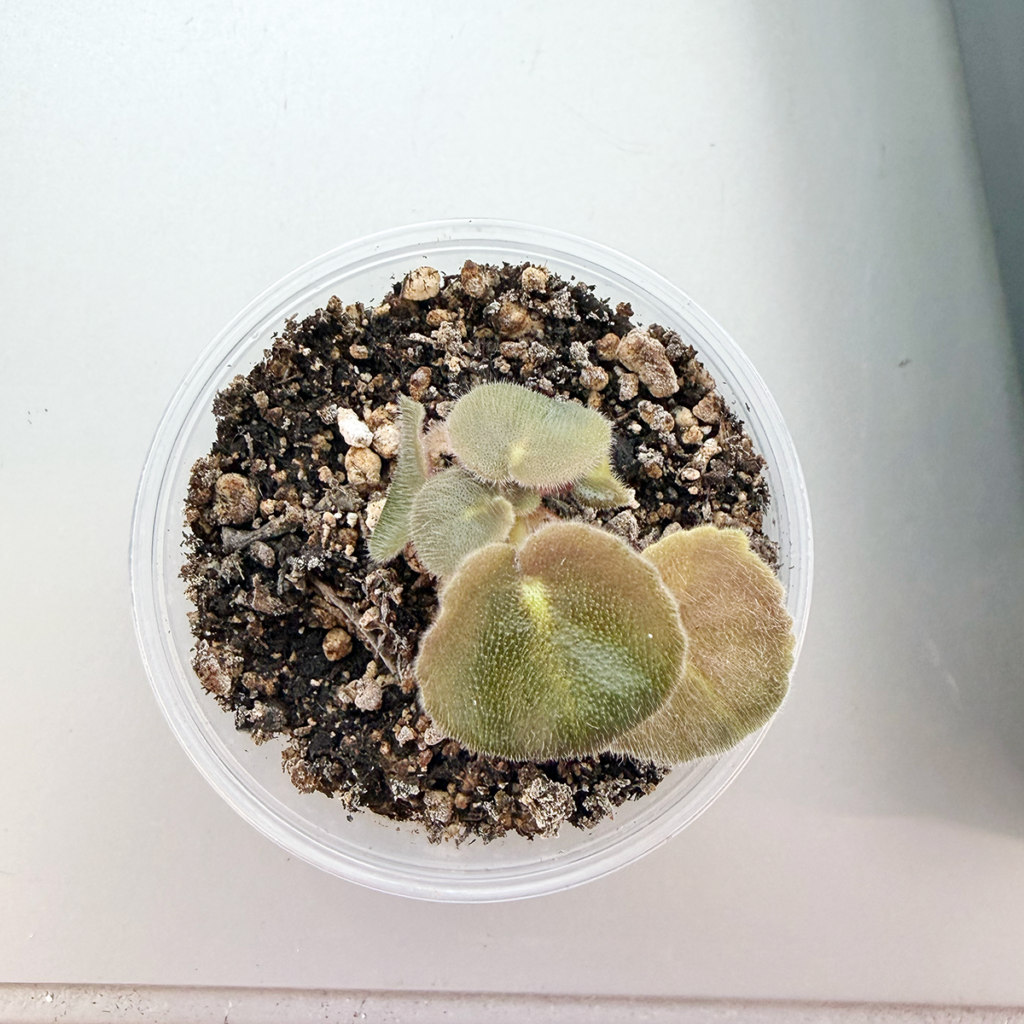
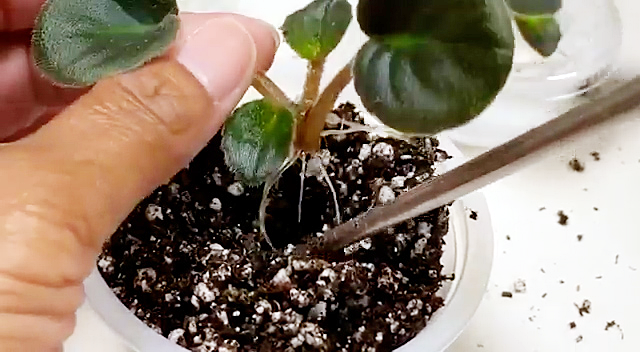
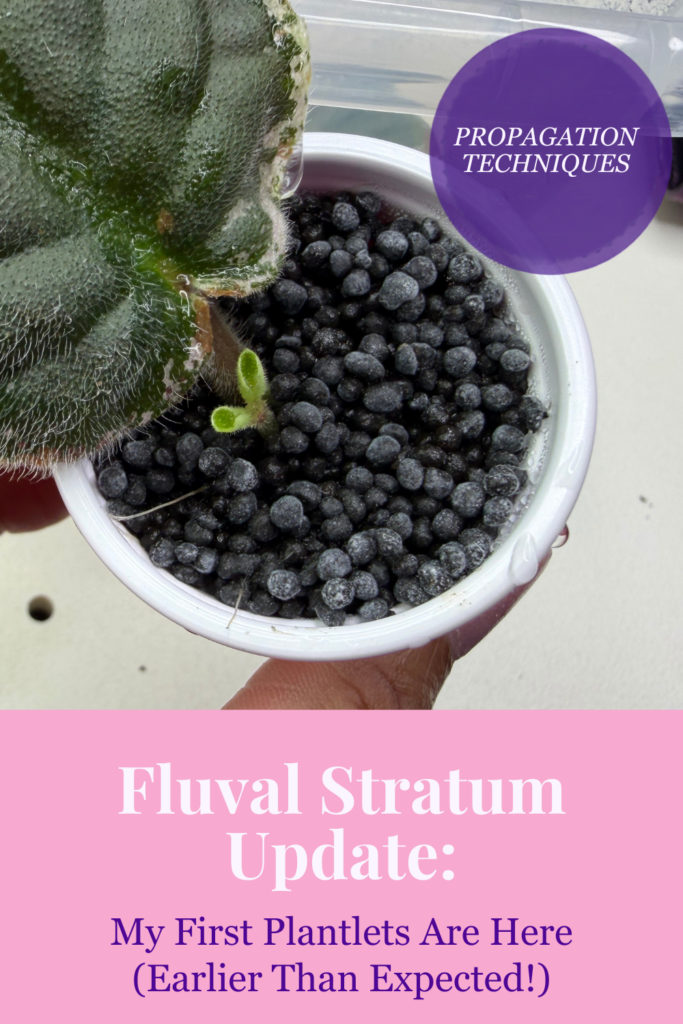
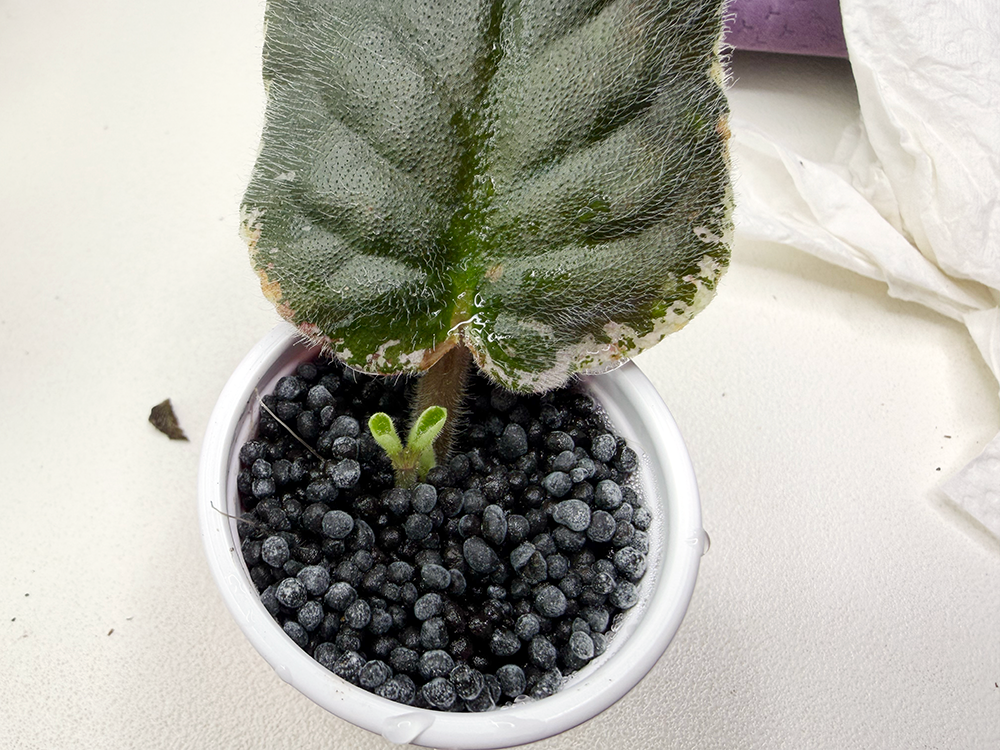
Well, it happened. I was watering my plants yesterday evening and on impulse, checked on my leaves, and there they were — tiny plantlets poking up from one of my Rivermist Sizzle leaves! 😮
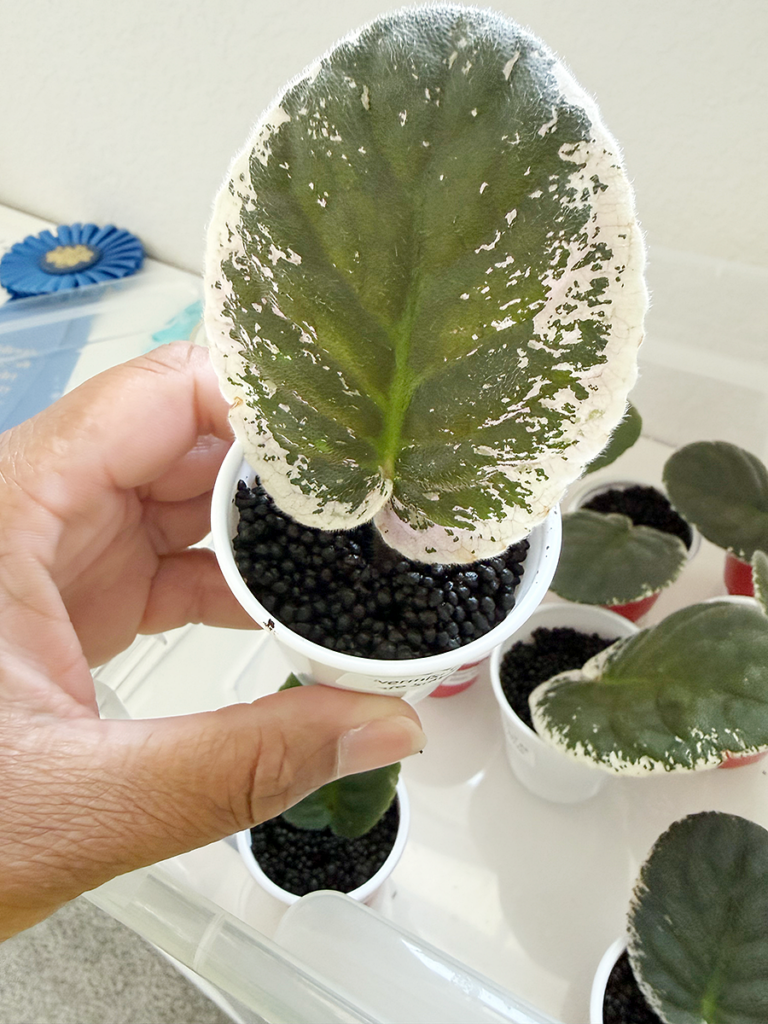
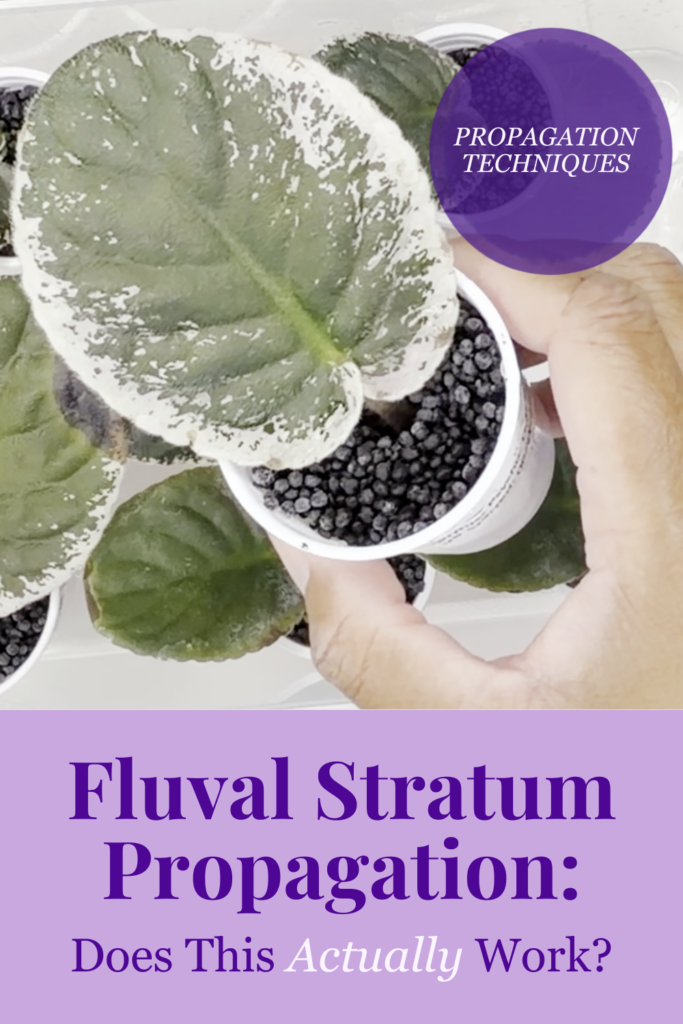
If you’ve been following along, you know I’ve been testing Fluval Stratum — as a propagation medium for my African violet leaves. (This is an affiliate link — if you purchase through it, I may earn a small commission at no extra cost to you.) I covered what it is and why it might work well for AV propagation in my first post, and now we’ve got an actual update to talk about.
The Timeline So Far
I planted these leaves in stratum on June 29th. Today is August 5th, which puts us a little over five weeks into the experiment.
For context, here’s roughly what I typically expect with my usual soil and perlite method:
– Rooting: Usually takes about two weeks to a month
– Plantlets appearing: Usually another month or two after that
So by that math, I wasn’t expecting to see plantlets until sometime until in late August at the earliest. Seeing them at five weeks is genuinely earlier than I anticipated.
PRO TIP: If you’re propagating and feeling impatient (no judgment, we’ve all been there), resist the urge to dig around and check on your leaf’s progress. Disturbing the stem while it’s trying to root can do more harm than good.
How the Rest of the Leaves Are Doing
The good news doesn’t stop there — the rest of my leaves in the stratum are all looking healthy…even the one I had to do minor surgery on to get rid of a bit of decay. That was my fault entirely, leaves shouldn’t be touching each other in such a moist environment. Other than that, no mush, no rot, no leaves that gave up on me. Every other leaf is just quietly doing its thing.
I’m calling myself cautiously optimistic at this point. One early plantlet doesn’t mean that stratum is definitively “better” than my usual methods. This could be a case of a particularly strong leaf — but it’s a promising sign, and I’ll keep watching to see if the rest follow on a similar timeline.
What’s Next?
I’ll keep tracking all the leaves and update you as more plantlets (hopefully) show up. If the rest of the batch roots and sprouts on a similar timeline, that’ll tell me a lot more about whether this is a genuine speed advantage or if that Rivermist Sizzle leaf is just an overachiever by nature.
Curious to see the plantlets for yourself? I’ve got the full update on video — check it out on YouTube!
Have you ever had one leaf in a batch surprise you by rooting way faster than the others? Drop a comment and let me know — I love hearing about your propagation wins.
I never thought I’d be walking through the aquarium aisle looking for African violet supplies, but here we are.
If you’ve been following along, you know I’m always tinkering with different propagation methods — water, soil, you name it. So when a couple of fellow AV growers mentioned they were having luck propagating leaves in Fluval Stratum, a substrate for aquarium plants, I figured it was worth a try myself. This post covers what Fluval Stratum actually is, why it might work well for AV propagation, and how I’m using it with my own leaves right now.
What Is Fluval Stratum, Anyway?
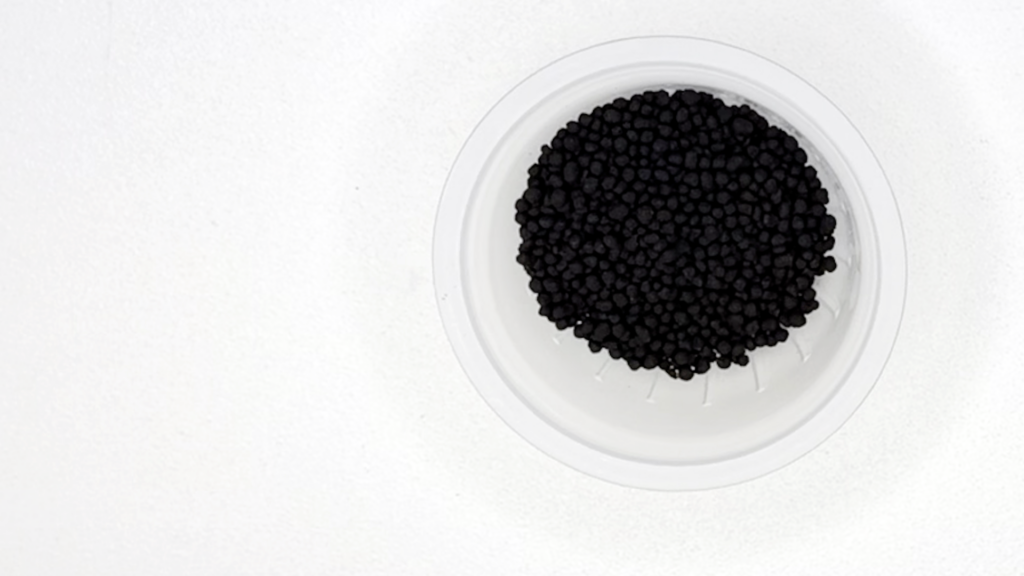
Fluval Stratum is a porous, volcanic soil substrate made by, you guessed it, volcanoes. Stratum is originally made for aquarium plants because it’s lightweight, holds moisture well, and still allows for airflow — which also happens to be perfect for rooting leaf cuttings. Too much moisture and no airflow, and you’re looking at rot. Too little moisture, and your cutting dries out before it has a chance to root.
Quick heads up on cost, though – a 4.4-pound bag ran about $26 at my local Petco, but I found it for closer to $15 to $16 on Amazon (https://amzn.to/4vRAAqr), so if you want to give this a shot, it’s worth shopping around before you buy. (This is an affiliate link — if you purchase through it, I may earn a small commission at no extra cost to you.)
Why It Might Work Well for AV Propagation
A few things make Fluval Stratum appealing for propagation specifically:
• It retains moisture without staying soggy
• Its porous texture gives roots room to breathe
• It’s inert, so it won’t introduce unwanted nutrients or throw off your water quality the way some soils can
• It’s not a hospitable environment for pests like fungus gnats or root mealybugs, since it’s inorganic rather than organic soil
None of this means it’s magic — but the properties do line up nicely with what a rooting AV leaf needs.
How I’m Using Fluval Stratum for African Violet Leaves
Here’s my process, if you want to try this yourself:
1. Choose a healthy, medium-aged leaf (not too young, not too old)
2. Cut the stem at an 45 degree angle, leaving about an inch of stem
3. Pour a small amount of stratum into a fine mesh sieve and rinse off excess dust.
4. Fill a small container with moistened Fluval Stratum. For the best moisture retention, choose a container without drainage holds
5. Make a small hole and insert the stem at an angle, just deep enough to stand on its own
6. Press gently around the base to secure it
7. Place the container in a plastic bag or under a plastic dome to help retain moisture.
8. Place in bright, indirect light and check moisture every few days.
Pro tip: Some growers dip the cut end in rooting hormone before planting to speed things along. It’s optional, but if you wish to try it, this is what I’ve used before.
What I’m Watching For
I’m mainly curious how the rooting speed and success rate compare to my usual water and soil methods. I started my experiment with this substrate in late June with some Rivermist leaves I won at my local violet club 50th Anniversary party. About a month later, most of the leaves seemed to have rooted and appear to be healthy. So now it’s a matter of waiting for new babies.
Rooting speed seems to be comparable with leaves I’ve rooted in soil or water at this point, but so far I hadn’t lost any to rot…at least not yet. Most of my leaf loss using the soil method usually happens within the first few weeks, so this at least seems to be promising. Eventually, because I’m a giant nerd, I’ll do a head to head test on all of the methods and you can be sure I’ll let you know all about it when the time comes. 😀
Can You Use Fluval Stratum for Full-Grown African Violet Plants?
Before you go repotting your whole collection in it, a quick word of caution: propagating a single leaf in stratum is a very different situation than potting up an established plant in it.
I’ve heard from other growers that using pure Fluval Stratum as a standalone potting medium for full-grown AVs can actually cause problems. A few reasons why:
• It doesn’t hold nutrients the way a soil-based mix does, so plants can struggle without regular, consistent fertilizing
• It’s denser than a typical AV soil mix, which can affect drainage and airflow around a more developed root system. In fact, I’ve heard reports of it clumping around roots as it breaks down, which is no bueno for your plant.
• African violets have fairly specific watering needs, and stratum’s moisture behavior in a full pot doesn’t always match what an established plant wants
Where it seems to work better is as an additive — mixed into your existing AV soil blend in smaller amounts to improve aeration and moisture retention, rather than replacing your potting mix entirely. Think of it more like a supporting ingredient than a full swap.
I haven’t personally tested stratum as a potting additive yet, but if you have, I’d love to hear how it went in the comments.
Is Fluval Stratum Worth Trying?
If you’ve got a bag of it sitting around from an aquarium project, or you’re looking for a new propagation method to play with, I think it’s worth a shot. Plus, you can try it out as an additive to your soil as well. I doubt it will replace soil propagation for me entirely, especially considering the cost, but I like having options — especially ones that might root a little faster or reduce rot risk.
I’m especially interested in trying fluval with bloom stalk propagation, a particular technique I haven’t had much success with yet in any method. At any rate, I’ve got 4 lbs worth of experimenting to do.
Have you tried propagating in fluval before? I’d love to hear how it went for you — drop a comment and let me know.
Want to see this in action? I walk through the whole process step by step in my latest video — check it out on YouTube!
I’ve been there. In fact that’s how I got hooked. You spot a gorgeous African violet at the garden center, absolutely smothered in blooms, and you think — yes, I’ve got to have that one. Fast forward a few months later and the flowers are long gone, the leaves look fine, but there are no flowers to be seen…not even a hint of a bud. And you’re standing there wondering what you did wrong.
A comment I always get after friends and family visit my plant room and see dozens of violets in bloom is, “How do you get them to bloom? I’ve tried it, and they’ve never bloomed for me”.
Here’s the good news. African violets aren’t really that hard to figure out once you learn what they like. They have specific conditions in which they will bloom and oftentimes, bloom profusely. And they are not difficult conditions to manage. Once you learn them, you’ll be rewarded with beautiful blooms all year round.
These are the five most common reasons I’ve seen — and experienced myself.
1. It’s Not Getting Enough Light
This is the big one, and it surprises people every time. A lot of newbies I’ve met either heard that AVs are low-light plants or that they can’t be in direct sunlight. It’s true that violets can’t be in bright direct light as it will discolor or burn their leaves. And it’s true that violets could exist in low light. But, there’s a difference between tolerating lower light and actually thriving in it. If you want blooms, your plant needs more light than you probably think.
Bright indirect light is the sweet spot — a few hours a day near an east- or west-facing window is ideal. A dim corner or a shelf far from any window? Your violet will survive, but it probably won’t flower.
If natural light is limited where you live, a grow light is genuinely worth it. This was the case in my old house and once I switched over to LED grow lights, the blooms kept on coming. I started with a programmable LED grow light like this one(affiliate link) — it makes it easy to dim it and set a consistent light schedule instead of remembering to flip a switch every day. Once my collection grew, I switched over to full spectrum LED strips that I attach to my plant stands. The strips plug into each other so I can light an entire plant stand with one cord. I then plug the lights into a programmable smart plug that allows me to schedule when the lights turn on and off via my mobile phone. If you want something less fancy, a regular timer works very well too. I keep my lights about 12 to 18 inches above the plants and they run about 10 to 12 hours a day.
Quick tell: If the leaf stems are stretching upward instead of lying relatively flat, your plant is likely reaching for more light. Move it closer to a window and see what happens. Incidentally, some violets do the same thing when the light is too strong…the leaves stretch inward to protect the center crown. The best thing is to adjust and observe until you find the right amount of light.
2. Fertilizer — Either the Wrong Kind or None at All
If you’ve grown other plants before, you may be used to only fertilizing your plants once or twice a year, or even not at all. This one got me early on too. The only other plant I’ve not killed was an orchid that I barely remembered to water. So I certainly wasn’t fertilizing it on a regular basis or, you know, at ALL. I assumed that as long as I was watering my AVs, they were fine. Nope! Blooming takes real energy, and if you haven’t fertilized in a while — or ever — that’s very likely part of the problem.
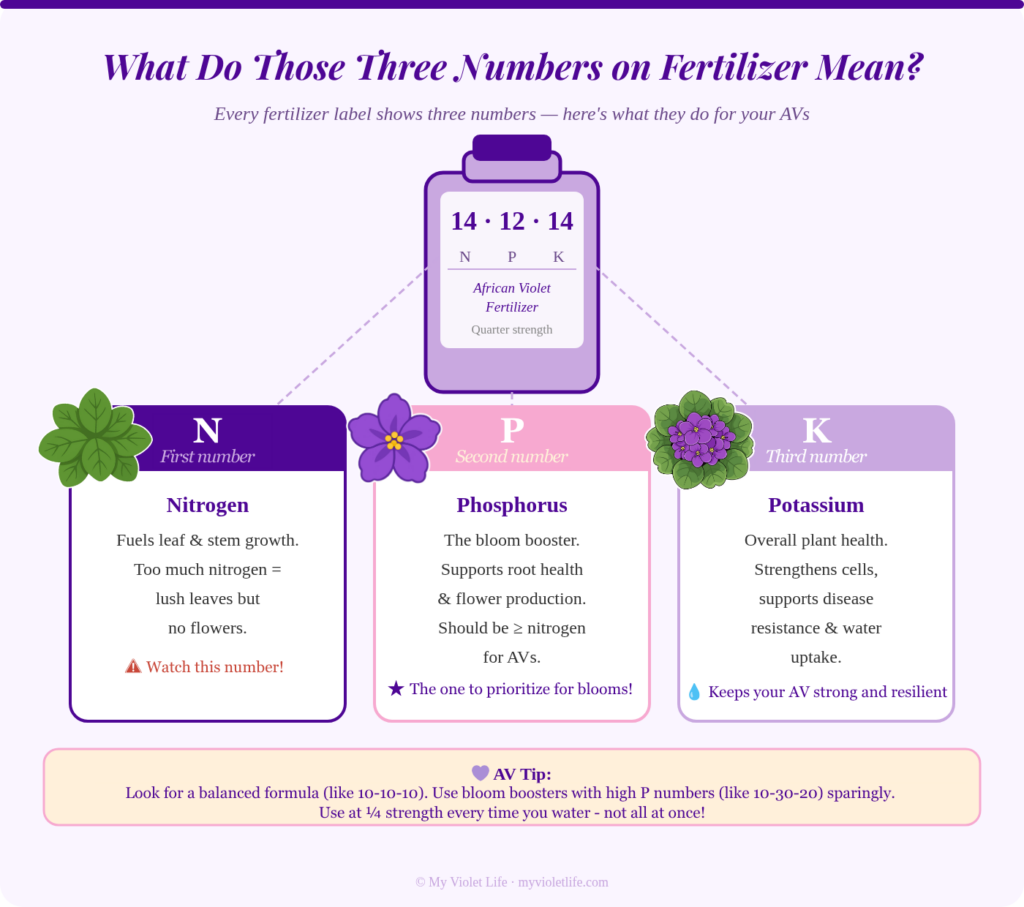
But here’s where it gets a little tricky. Fertilizer has three components that plants need in different amounts: nitrogen, phosphorus, and potassium. If you look at a bottle of fertilizer, you’ll see three numbers which show the ratio of these components, for example; 12-8-12. The first number represents nitrogen, the second represents phosphorus, and the third represents potassium.
For African violets: fertilizers with a high first number, nitrogen, actually works against you. High-nitrogen fertilizers push out beautiful leafy growth, which sounds great until you realize you’ve got a lush, gorgeous plant with zero flowers to show for it.
What you want is a fertilizer where the phosphorus — the middle number on the label — is about equal to or higher than the nitrogen. Once I learned this, I started off with Schultz’s African violet liquid fertilizer(affiliate link), which is usually widely available at your local garden center. After some trial and error, I eventually settled on using the African violet-specific formula from Optimara for all of my plants. Some of my African violet club members also use mixes formulated for orchids as well, but Optimara’s fertilizer has worked pretty consistently for me. I mix about ⅛ to ¼ teaspoon of fertilizer to a gallon of water and fertilize every time I water rather than doing a full dose every month. Little and often is the way to go AND it’s easy to keep up with.
You may also see fertilizers that have a very high middle number like 10-30-20 or Jack’s Classic 12-36-14(affiliate link). These are known as “Bloom busters.” Can you use these for your plants?
Short answer: “Yes, but”.
Longer answer: Yes if you need your plant to bloom profusely at a specific time like preparing your plant for a show, but I wouldn’t recommend using them in the long term. These formulations prioritize heavy blooming over healthy growth which can stress your plant if you use it for months on end. It’s better to use a formula that’s more balanced so that you can have blooms AND healthy foliage, which makes for a healthy, happy plant.
Note: if you fertilize every time you water, be sure to occasionally flush out your violet with plain water about every 4 to 6 weeks. This will help to keep the fertilizer salts from building up the soil which can damage the roots.
3. The Pot Size Is Off
African violets can be pretty particular about their pots, and getting the size wrong — in either direction — can affect blooming.
A common AV newbie mistake is picking a pot that’s way too large for the plant. If you’ve grown plants before…or even if you haven’t, it’s an understandable mistake to make. But it can be one that at best, prevents your violet from blooming, and at worse it can put your violet in danger.
Please don’t do this.
If the pot is too large and your violet is swimming in a sea of soil, two things can happen…and blooms aren’t one of them. One, your violet puts most of its energy into filling that sea of soil full of roots. Violets tend to start blooming once their roots reach some kind of obstruction, like the pot walls. That’s an indication to the plant to shift its focus from growing roots to growing blooms. Second, a sea of damp soil is dangerous to the health of your violet roots. AV roots are pretty delicate and prone to rot if submerged in wet soil for too long.
On the other hand, a plant that’s severely root-bound is stressed, plain and simple. A slightly root-bound violet will tend to bloom. A violet that has roots circling the bottom of the pot or pushing out the drainage hole is typically in survival mode. It’s not going to put energy into flowers.
The rule of thumb I follow: the pot should be roughly one-third the diameter of the plant. When in doubt, check the drainage hole. If roots are escaping, go up one size — JUST one. OR if you want to keep the violet in the same pot, you can carefully trim the roots at the bottom and sides of the root ball. You can check out my video on repotting for more information on pot sizes and how to properly pot your violet.
4. Watering Problems
I feel like watering is where most of us mess up at some point, myself very much included. African violets are not drought-tolerant, but they’re even less tolerant of sitting in soggy soil. Overwatering is the more common mistake.
When roots stay wet too long, they can’t absorb nutrients properly — and a plant that can’t absorb nutrients isn’t going to put out blooms. In the worse case, overwatering leads to root rot, and at that point you’ve got bigger problems than no flowers.
Underwatering causes stress too…it tends to be less fatal than overwatering. But a thirsty plant is just trying to survive…it’s not going to waste energy it doesn’t have by making lots of flowers.
The fix: water when the top inch of soil feels dry. Just stick your finger in the soil and feel. I bottom water whenever possible — I set the pot in a dish like this one or if you’re watering multiple plants, you can use a tray like this. You fill it with room-temperature water for about 20 to 30 minutes and let it soak up what it needs. Then I take it out and let it drain.
And remember — room temperature water only. Cold water on the leaves causes those white spots and burn marks you might have noticed, and cold water at the roots is a shock the plant doesn’t need.
5. The Environment Isn’t Quite Right
African violets like comfortable, stable conditions (the key word here is stable) — around 65 to 75°F, away from drafts, away from heating and air conditioning vents, and with decent humidity. They’re not asking for much, but they do notice when things aren’t right.
Dry air is a sneaky killer of flower buds. In the winter especially, when the heat is running constantly, indoor humidity can drop pretty significantly. Low humidity can cause buds to form and then dry up before they ever open. I find that especially heartbreaking and frustrating — you’re eagerly watching flower buds grow and they simply dry up and shrivel away before they even get big enough to open.
A humidity tray is an easy fix — just a shallow tray with pebbles and a little water set underneath the pot. The water evaporates around the plant without the pot sitting directly in it. I’ve also found that grouping plants together helps raise the humidity around them naturally. If you don’t have a lot of plants around, you can also try doming your violet…that is, putting them under plastic or glass dome to help keep the humidity in. Just be sure to watch sides of the dome. If it starts getting large drops of condensation on the inside, open it slightly to let some of the humidity out and dry off the leaves if they start getting drops of water on them. You don’t need too much of a good thing.
So Where Do You Start?
If your African violet isn’t blooming and you’re not sure which of these is the culprit, start with light. It’s the most common issue, and it’s the easiest thing to adjust. Move the plant, give it a few weeks, and see if anything changes before you go troubleshooting everything else at once. There are some varieties out there that are genuine prima donnas that refuse to bloom unless they’re grown in exacting conditions (drop into any AV group and ask…you’ll get a list). But 99% of violets aren’t that hard to please.
These plants are a lot more resilient than they sometimes get credit for. They’re not demanding, they just know what they like and what they like isn’t that hard to provide. More often than not, a non-blooming violet just needs one thing fixed — and then it rewards you in a big way.
Have you dealt with a violet that just refused to bloom? I’d love to hear what ended up being the fix for you — leave a comment and let me know!
And if you want to see more African violet care tips, come find me on YouTube at My Violet Life — I’d love to have you over there too.
If you’ve just brought home your first African violet — or if you’ve killed a couple and you’re trying to figure out what went wrong — this guide is for you.
I’m Nicolette, and I want to be upfront with you: I was not a plant person. Not even a little bit. The orchid in my kitchen survived despite me, not because of me. My whole African violet obsession started on Mother’s Day 2021 when I spotted a display at Lowe’s on the way to buy a Mother’s Day plant for my mom. I remembered that my own grandmother grew African violets. On a whim, I grabbed two plants for myself, brought them home and named them Rosa and Lee after my grandmother. After the blooms that had attracted me at the store faded and withered away, I waited anxiously in hopes that the plants would bloom again. And…nothing…for months…because I had no idea what I was doing.
A few years, after many, many more plants, even more rescued leaves, and a dedicated plant room later, I’ve learned a lot — mostly through trial and and a lot of error. This guide is everything I wish someone had handed me on day one.
📌 Free download: Grab my African Violet Care Cheat Sheet — a three-page quick reference that covers everything in this guide.
African violets (Saintpaulia) are small flowering houseplants native to Tanzania and Kenya. They’re one of the most popular houseplants in the world — and for good reason. When they’re happy, they bloom almost continuously..
What most beginners don’t realize (I definitely didn’t) is that “African violet” isn’t just one type of plant. The kind that you’re likely to be familiar with when you see them at your local garden center or big box store. Little plant with fuzzy dark green leaves and purple, pink or white flowers.
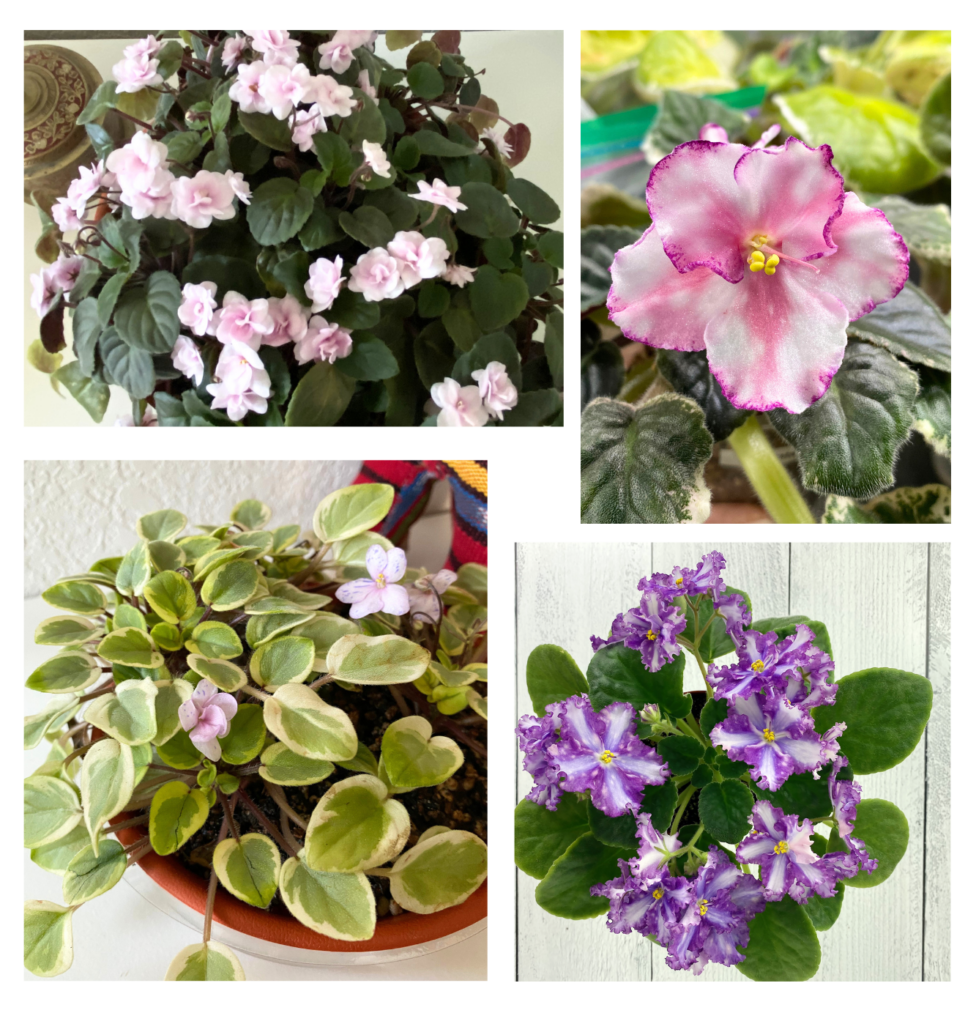
Here’s the truth that blew my mind in those early days. There are thousands of named cultivars — hybridized varieties with names like Jersey Snowflakes, Rob’s Vanilla Trail, and Buckeye Nostalgia. They come in minis and micro minis that fit in the palm of your hand, standard sizes, and large trailers that spill out of hanging baskets. Leaves that are dark green to light green or variegated in shades of green, yellow, pink and white. Leaves that have frilled edges, serrated edges, or smooth edged. Leaves that are fuzzy…or not. Flowers range from tiny single petals to frilly doubles, in colors from deep violet to pure white to candy-stripe bicolors. Flowers that come with beautiful markings like light pinpoint dots and puffy spots, marbled streaks of color or pinwheel stripes. Once you know that world exists, it’s very hard to own just one.
These are just some examples of the wonderful varieties of African violets available. How can you choose just one?
Before you go down that particular rabbit hole, let’s make sure your plant actually survives. Here’s what they need.
The 5 Essentials for a Thriving African Violet
1. Light: Bright, But Never Direct Sun
African violets need plenty of light to bloom. They should never be in direct sunlight because direct sun will burn or sun bleach those beautiful leaves. The sweet spot is bright, indirect light or light filtered through something like a sheer curtain.
In practice, this usually means:
A north- or east-facing windowsill is ideal
South or west windows can work if the plant is a few feet back from the glass or shielded by a sheer curtain
If your plant is growing but not blooming, it’s almost certainly not getting enough light
Grow lights are a game changer if your space is dark — a simple LED grow light on a timer (8 – 12 hours on, 14 – 12 hours off) will keep them blooming year-round
Note: Make sure the leaves of your plant aren’t touching the glass of your window. A sudden heat wave or cold snap will damage the leaf touching the glass
Quick test: If you can comfortably read a book at that spot without turning on a lamp, it’s probably enough light for your violet. If it feels dim, your plant thinks so too.
2. Watering: Less Is More (and Method Matters)
Overwatering is the #1 reason African violets die. I know this because it’s how I lost my first couple plants, Bob and Walter (yes, I named them). The soil should never stay soggy — roots sitting in wet soil will rot, and by the time you notice something is wrong, it’s often pretty advanced.
Why is so easy to overwater your violet? Because an overwatered violet looks very similar to an underwatered violet, limp and droopy. But it’s easier for a violet to recover from a lack of water rather than the other way around. So how can you tell if your violet needs water? A simple rule of thumb: water when the top half-inch of soil feels dry to the touch. Not bone dry, not damp — just losing moisture.
How you water matters just as much as when:
For beginners, bottom watering is best: set the pot in a shallow dish of room-temperature water for about 20–30 minutes, let it soak up from the drainage holes, then remove and let it drain. This keeps water off the leaves and encourages deep root growth.
Top watering works too, but be careful to keep water off the foliage. Water on fuzzy leaves in bright light or cold temperatures can cause spotting.
Always use room-temperature water. Cold water shocks the roots and can cause white spots or rings on the leaves.
If your tap water is heavily treated with chlorine or if your municipal water supply is in question, consider using filtered, distilled, or room-temperature tap water that’s been left to sit overnight. (I eventually got a water distiller — more on water choices in this post.)
3. Soil: Light, Airy, and Well-Draining
Standard potting mix is too heavy for African violets. Their roots aren’t as sturdy as most houseplants and they need a light, airy medium that drains well but holds just enough moisture. If your soil stays wet for more than a day or two after watering, it’s too dense.
You have two good options:
Buy an African violet-specific potting mix. Look for brands like Espoma or Black Gold (one of my favorites) — these are formulated to drain properly. Serious hobbyists and professional may use Pro Mix MX. Some growers I’ve heard from has had mixed results with Miracle-Gro AV formula as fertilizer is already mixed in the soil. This makes it harder to calculate how much fertilizer your plant is already getting and it’s easy to overfertilize if you are also adding additional fertilizer.
Mix your own: a common DIY mix is 1 to 1 and a half part perlite to 2 parts peat-based potting mix, which improves drainage and aeration.
If you stick your finger into the soil and it feels wet and compacted for days after watering, it’s time to repot into a better mix. Good soil is one of the easiest wins you can give your plant.
4. Pot Size: Smaller Than You Think
One of the most common beginner mistakes is putting an African violet in a pot that’s too large. African violets like to be slightly snug in their pot — a good general rule is that the pot diameter should be about 1/3 the diameter of the plant’s leaf spread.
Too much soil around the roots holds excess moisture (hello, root rot) and the plant often focuses on root growth instead of putting energy into flowers.
When it comes to pot type:
Plastic pots retain moisture longer than clay — fine if you tend to underwater
Terracotta/clay pots dry out faster — better if you tend to overwater
Self-watering wicking pots like the Dandy pot are popular with African violet growers and can make watering more consistent once you get the hang of them. Just make sure that your soil mix is even lighter than usual to avoid waterlogging your roots, at least 55% perlite to 45% peat moss.
5. Fertilizer: Feed Regularly, But Lightly
African violets are regular bloomers, and that takes energy. A balanced fertilizer designed for African violets (look for a formula like 14-12-14 or similar) applied at ¼ the recommended strength with every watering will keep them fed without burning the roots.
Two things to avoid:
Over-fertilizing: too much fertilizer builds up salts in the soil and can damage roots. Flush the soil with plain water occasionally to clear buildup
Fertilizing a stressed plant: if your plant is droopy, dry, or recovering from something, wait until it’s stable before adding fertilizer. A stressed plant can’t use it and it can make things worse.
Also, after a fresh repot you can lay off the fertilizer for a couple of weeks while your violets absorb the nutrients from newly fresh soil.
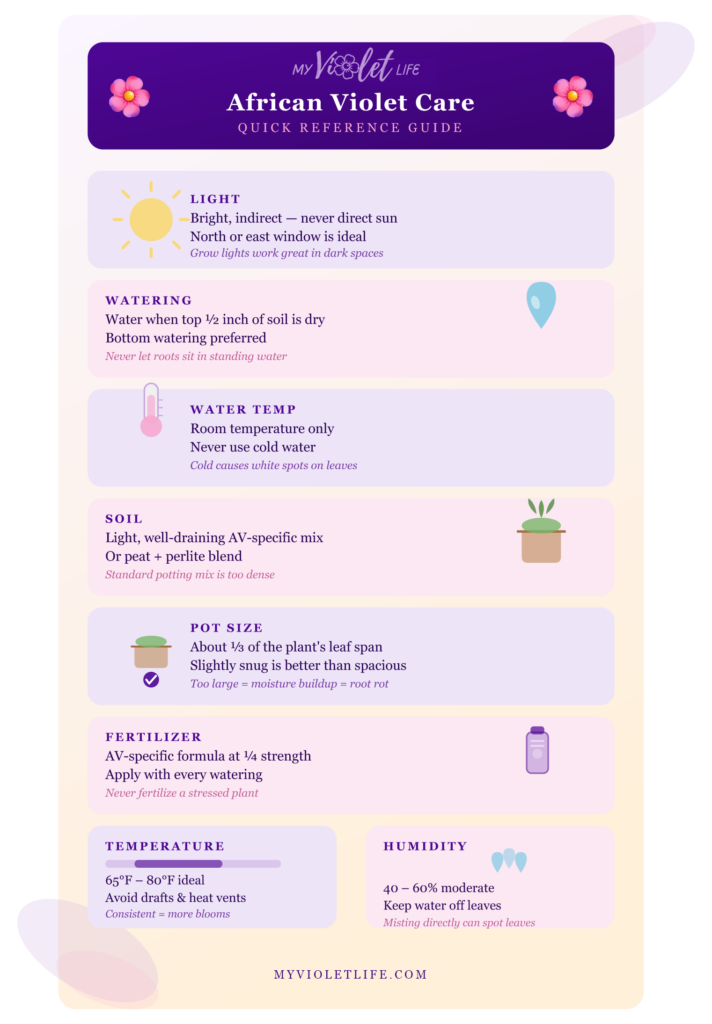
Quick Reference: African Violet Care at a Glance
Common Problems (and What They’re Telling You)
If something looks off with your plant, here’s a quick diagnosis guide:
Bottom line: What violets really prefer is consistency. Consistent light, water, fertilizer and growing environment. Nail down these items and you’re well on your way to a very rewarding and wildly addicting hobby.
Frequently Asked Questions
1. How often should I water my African violet?
There’s no fixed schedule — it depends on your pot size, soil, and environment. More humid environments usually require less watering than dry ones. Check the top half-inch of soil: water when it feels dry, wait when it doesn’t. Most plants end up needing water roughly once a week, but checking is always better than guessing.
2. Why is my African violet not blooming?
The most common reason is not enough light. Move it closer to a bright window (but not in direct sun or touching the glass) or add a grow light. Inconsistent fertilizing and being seriously root-bound are other common causes. For a full breakdown, see: Why Your African Violet Isn’t Blooming. [ADD LINK WHEN PUBLISHED]
3. Can I use tap water for African violets?
It depends on your tap water quality. Many growers use it without issue. If your municipal water is heavily chlorinated or has a strong chemical smell, you might notice it affecting your plants over time. Options include letting tap water sit overnight to let chlorine dissipate, using a filter, or switching to distilled or RO water. I went deep on this in my water guide.
4. Do African violets need special soil?
Yes — standard potting mix is usually too dense and holds too much moisture. AV-specific mixes or a blend of peat and perlite will serve your plants much better.
5. How do I know when to repot?
3 signs it’s time to repot:
roots coming out of the drainage holes
the plant is clearly larger than its pot
the soil has compacted so much that water runs straight through without being absorbed
Most standard size African violets benefit from a fresh pot and fresh soil every 9 to 12 months. Smaller sized violets like semi-miniature and miniatures would need more frequent potting depending on the pot size, anywhere from every 4 to 6 months. I do a step by step guide on how to repot your African violet on my YouTube channel.
Ready to Keep Going?
African violets are genuinely one of the most rewarding plants to grow once you understand what they need. They’re not fussy — they’re just specific. Get the light and watering right, use good soil, and you’ll have a blooming plant that’ll make you embarrassingly proud.
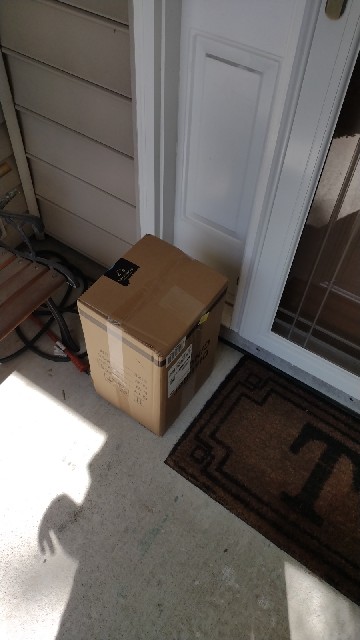
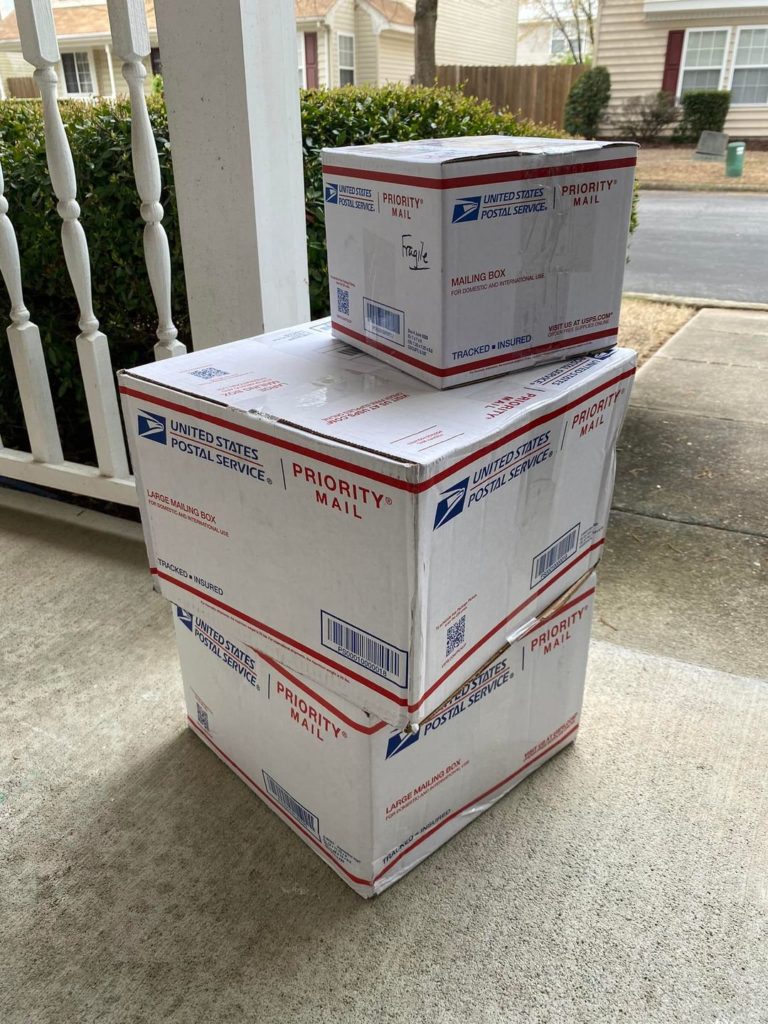
There have been plenty of packages dropped on my doorstep in the past couple of months. But today’s package did not contain live plants (or leaves) for a change.
Delivery photos from Amazon always crack me up
About a month ago, I made the decision to purchase a water distiller. When I was learning about how to care for African violets, I found that it’s best to avoid using water that contained chlorine, chlorimides, or ammonia…which many municipal water treatment facilities tend to add. As DH and I have never been fans of our own city’s water supply, we tended to use bottled water instead of tap water. I had already been using distilled water for other things in the house, so in time I also started using it for my AVs.
As my AV collection began to grow by leaps and bounds, I found that I was purchasing a gallon jug or two of water a week just to keep up! So distilling my own water seemed to make some sense to me…with the added bonus of fewer plastic jugs to recycle!
The way distilling works is that water inside the machine is heated up until it turns into steam. Then the steam rises to the top of the unit and is cooled down, which turns the steam back into a liquid, which is filtered through a charcoal packet.
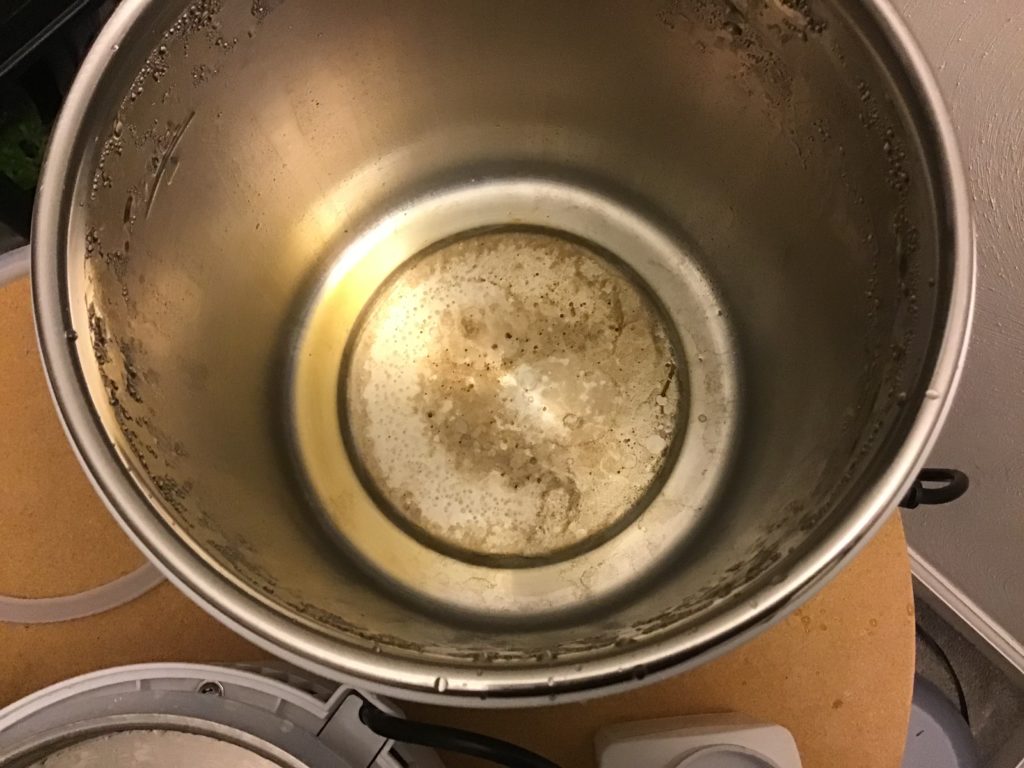
All of the impurities, minerals, bacteria and most of the chemicals present in the water either evaporate or are left behind at the bottom of the distiller. The process of distilling a gallon of water took about 4 hours.
What’s left behind after distilling. Looks pretty gross and doesn’t smell that great either.
This isn’t to say that distilled water is always the best type of water to use for African violets. I found it useful for water propagation (all the leaves I started with our city tap water died within a week or so), and for making the fertilized water I use for my plants. Plus I’ve found myself needing to clean my plant room humidifier less when using distilled water instead of tap water.
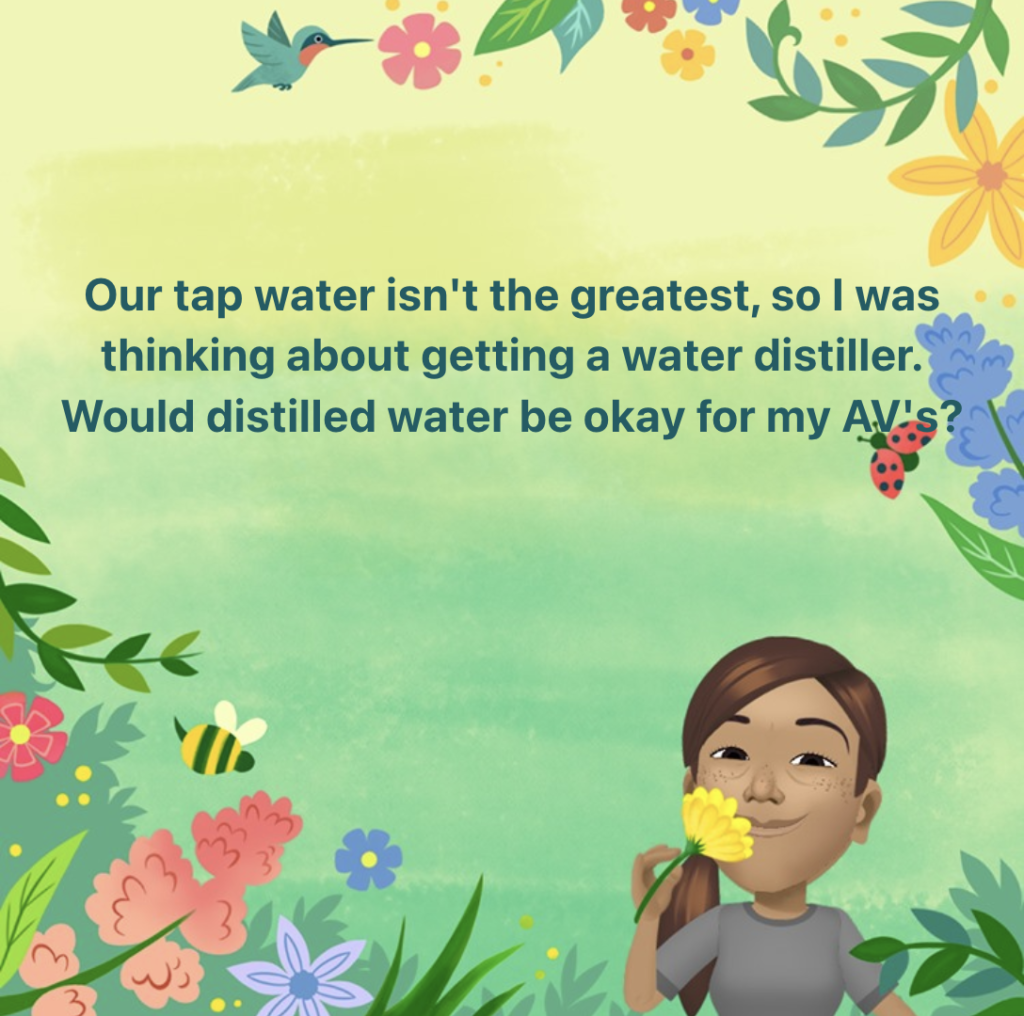
But that’s not to say that you have to use distilled water. If you ever want to start a whole- ass debate among AV enthusiasts, ask a group of them about the best type of water to use for African violets. I unknowingly started a pretty lively debate when I put the question to my AV Facebook group.
Seemed like a simple enough question…
When it comes to watering their beloved AVs, it seems like everyone has an answer that works for them and most of the responses I got fell into one of these groups:
Tap water– A good many folks said that they use plain old tap water. In these cases, the water that came out of the tap was already pretty good quality or it came from a source of good quality water, such as a private well. In some of these cases, chemicals like chlorine or chlorimides were added to the water, so they did suggest using chlorine remover (the same kind used for aquariums) to dissolve traces of chlorine in the water. If like me, you find that your tap water is questionable, this might not be a great option for you.
Distilled water– A few people said that they also used distilled water, which is a type of purified water. As described above, this is water that’s heated until it becomes steam and then cooled back down into a liquid. This method removes most impurities and bacteria that might be harmful to your AVs. In addition to watering your AVs, distilled water is also great for use in machines like humidifiers or other mechanical devices. On the other hand, the process of distilling water also removes minerals like calcium and magnesium, which are beneficial for plants. Lacking these minerals for too long could hinder growth. To compensate for this you can add a calcium and magnesium supplement to the water before using on your AVs. Our local violet guru, in the Tidewater African Violet Society, Pat, recommended using a supplement like CalMag to your water or adding bone meal to the soil mix to ensure that violets watered with purified water gets these important minerals.
Reverse osmosis (RO) water– One gentleman suggested that I use a RODI (Reverse Osmosis DeIonized) unit instead of a water distiller. Reverse osmosis is another type of purified water where water molecules are forced through a series of semi-permeable membranes that filter out impurities and bacteria. The advantage of RO water is that you can install a unit for your home water system instead of spending a couple of hours a day distilling water. Alternately, you can also buy large bottles of RO water instead. Installing a RODI unit can cost anywhere from a couple hundred to a couple of thousand dollars depending on how you’re planning on using it. It’s also recommended that you add a calcium and magnesium supplement to RO water or add bone meal to your soil mix.
Rainwater– Another gentleman swore by using rainwater and it’s pretty easy to understand why. It’s free. You can collect rainwater by setting out containers or by using a rain barrel. You don’t have to worry about removing the chemicals your municipal water supply may have added and it also has the beneficial minerals that plants love. Plants are, after all, built to use rainwater. But, as with everything, there are a couple of disadvantages too. Rainwater can pick up contaminants in the air or through runoff on buildings. So if you live near a factory or if your air quality is a bit iffy, or even if it’s spring and there’s loads of pollen in the air, those issues can also show up in your rainwater. Plus, if you live in an area that doesn’t get rain on a regular basis, or if your area hits a dry spell, you may need to stockpile rainwater to get you through the dry periods
One thing that most people agreed on was if you’re not sure about the quality of your water, the best thing you can do is test it. The ideal pH range for African violets is about 6.5 to 7.5. Distilled and RO water is at neutral 7. The pH and quality of your tap water and rainwater may vary, so doing periodic tests using some simple kits you can find in an aquarium supply shop or on Amazon will help alert you to potential problems.
Lastly, they also reminded me that I need to watch the temperature of the water I’m using. Violets hate cold water….lukewarm or room temperature is best. And when top watering, be sure to gently wipe away any drops that land on the leaves.
I’m pretty sure that using a water distiller is not going to be my final solution, especially after seeing what kind of impurities it’s removing. Our violet guru Pat said that she had installed a RODI unit for her flowers and I’m thinking that I’ll probably transition over to that eventually. It would be nice to simply turn on the tap and get nice purified water!
What is your preferred source for watering your AVs? Leave a comment and share!
The first step is acknowledging you have a problem…🤔
It’s that time of year! The temperatures are warming up and the online violet sellers and local garden centers are once again offering violets for sale! After several long, cold winter months of scrolling through websites, drooling over everyone else’s violet photos, and building up my wishlist, my spring African violet shopping spree has begun.
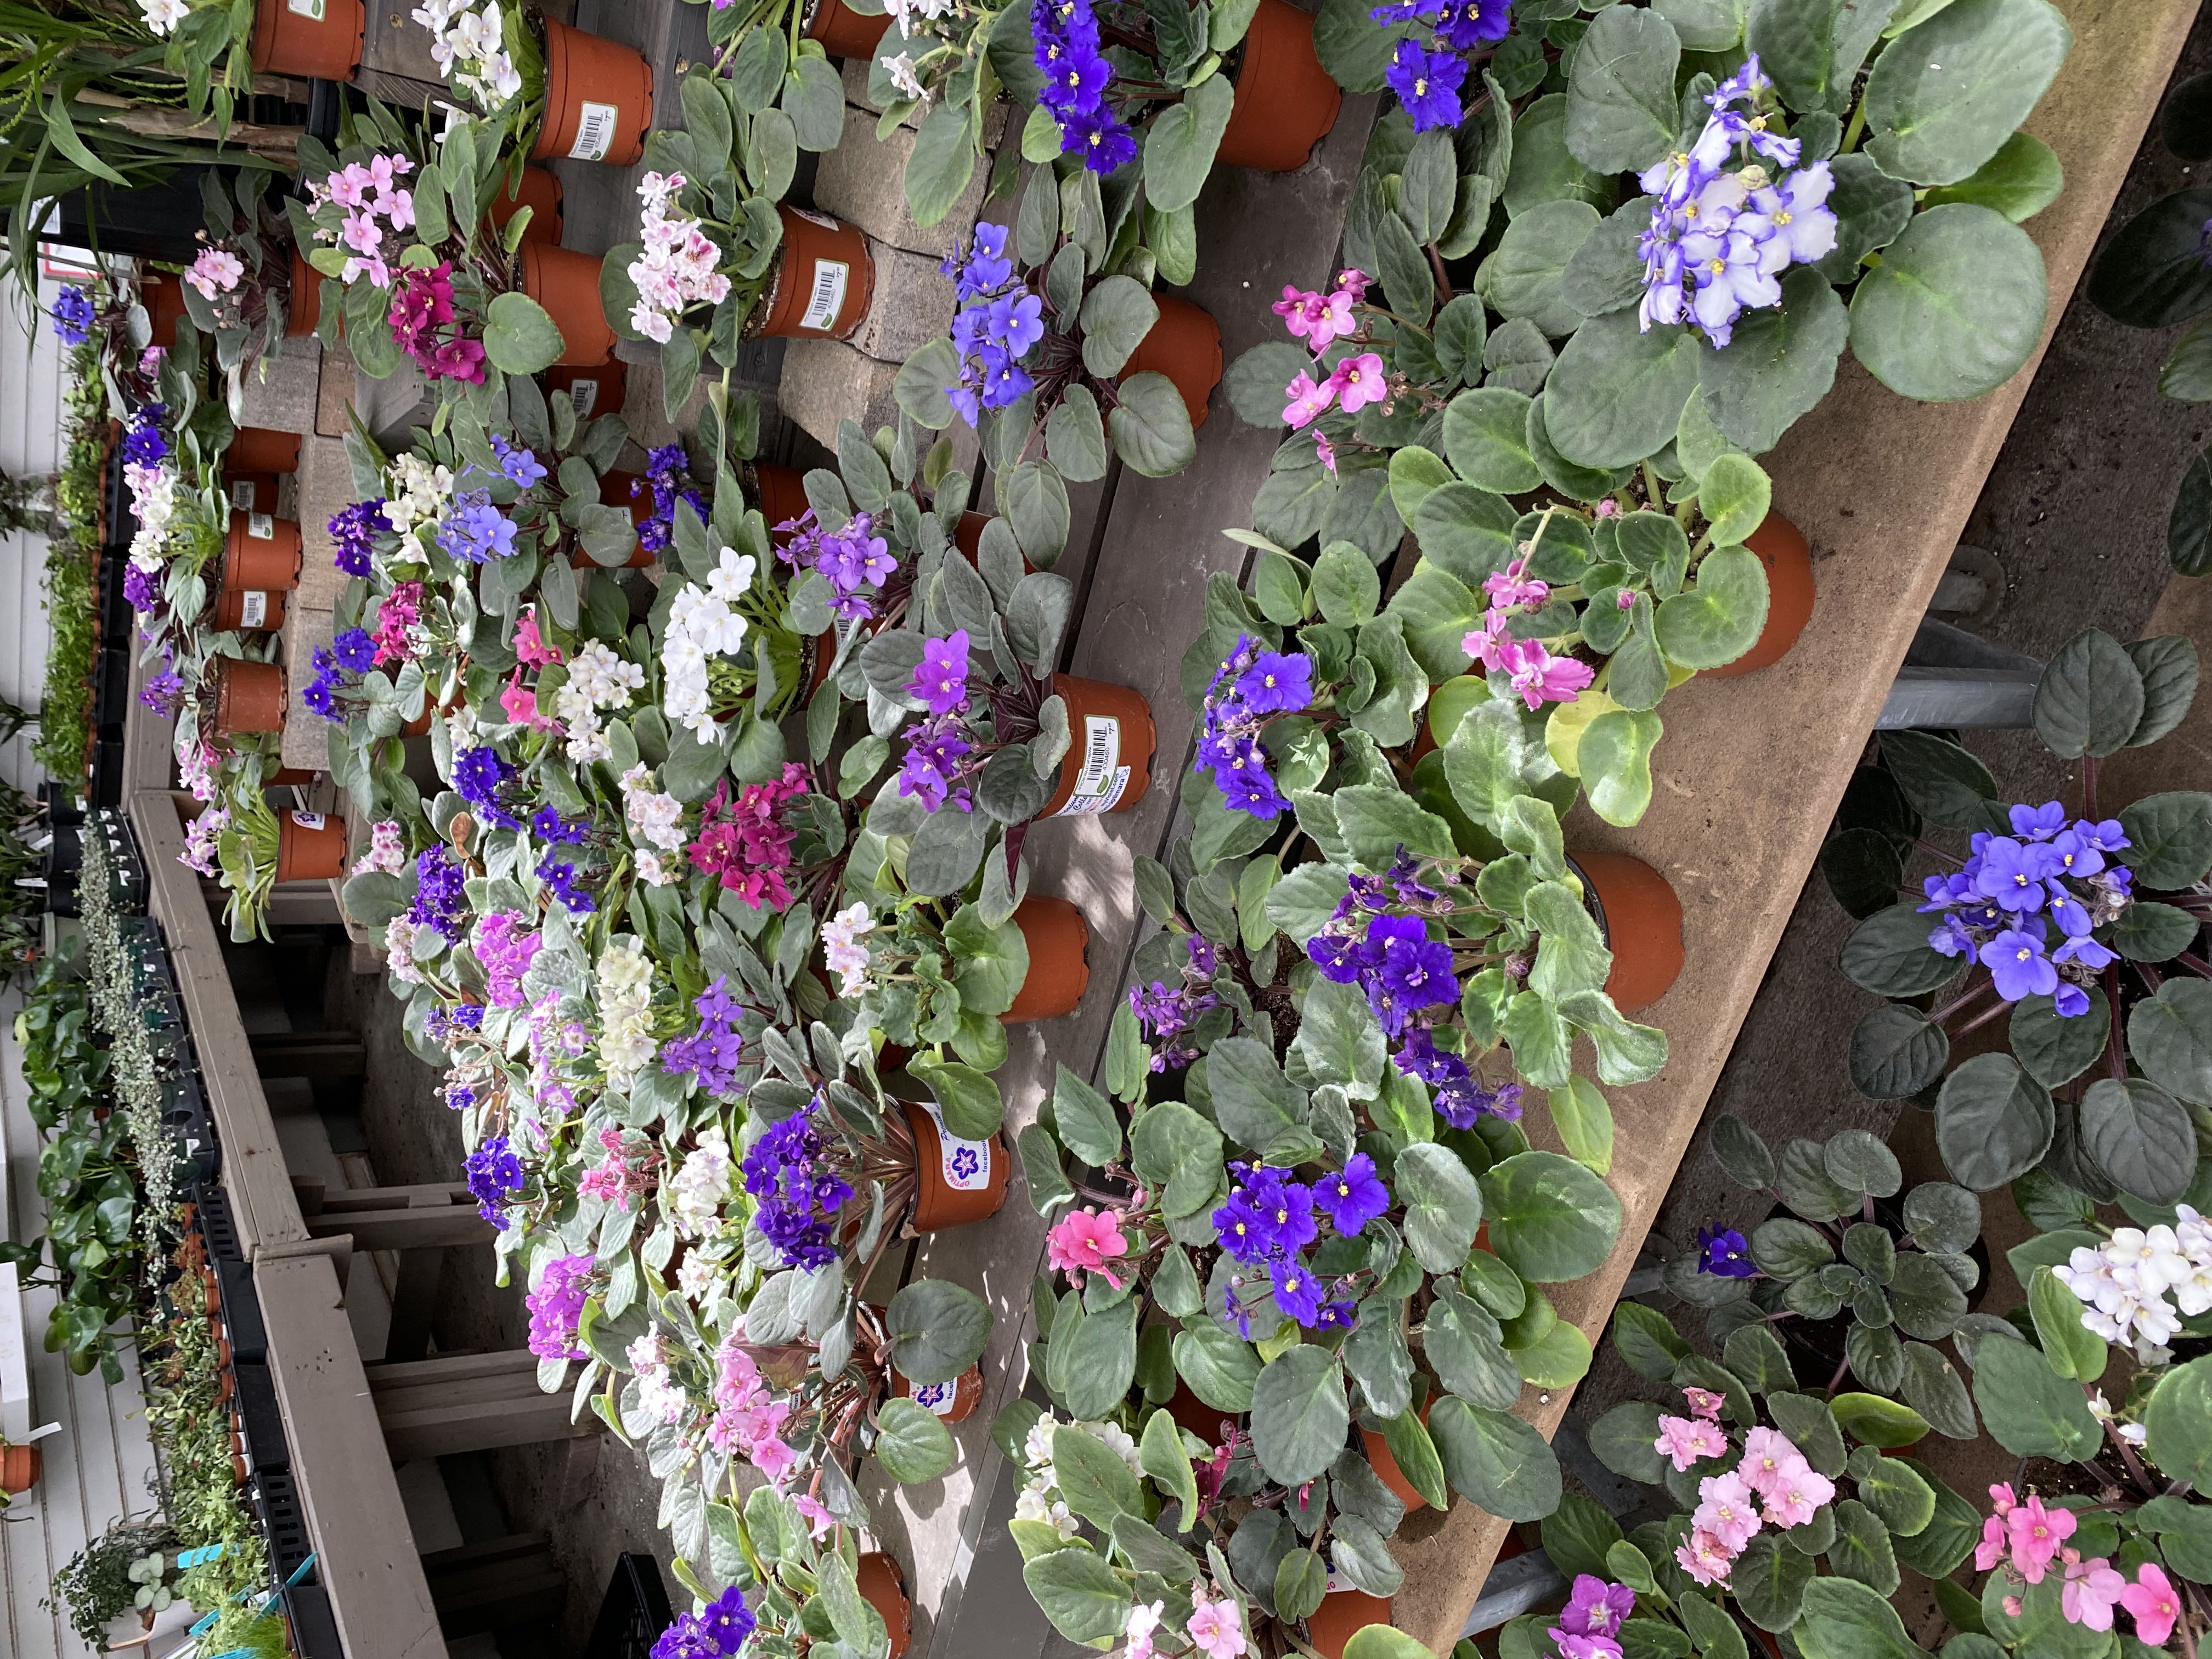
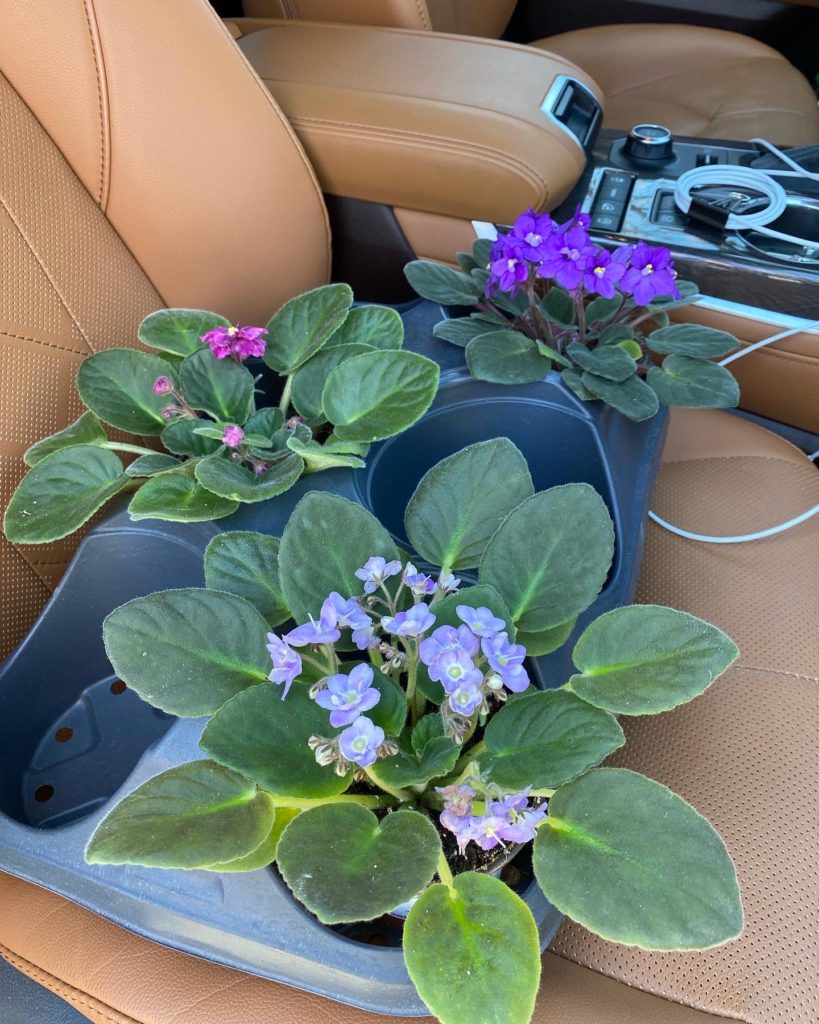
The spree began in early March with a random trip to my local garden center to pick up seedling soil where I was greeted with this sight:
All Optimara violets. Could you believe this is only one side of the display? 🥲
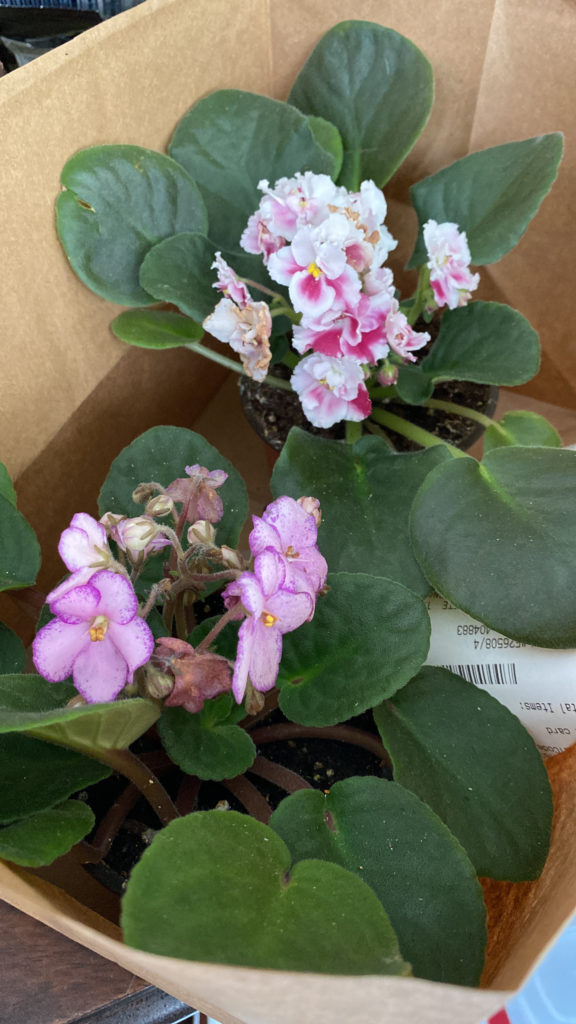
So of course I went home with more than just seedling soil:
Meet Marylin, Geraldine, and Valerie. I’m impressed that I restrained myself to only three
And of course, I went back two days later:
So I also had to get Sarah and Gladys too…
In addition to my haul from my local violet paradise, some of my favorite online violet sellers like Linda’s Secret Garden and Petals and Leaves were updating their inventories as well. So new boxes of violets have been a frequent sight on my doorstep in the past few weeks. I’ve recently discovered a few other vendors like Appalachian Violets, Woodland Blooms, and Gary’s Violets and they’ve quickly been added to my growing list of favorites.
I’ve shot unboxing videos of all of my new spring violet shipments and will be posting them to my YouTube channel soon. In the meantime, I’ve just posted a video about how I choose and inspect new violets from big box stores and local garden centers. I also go through how I prep my new beauties once I get them home. Everyone has their own process, so if you’re curious about mine you can check out the video here:

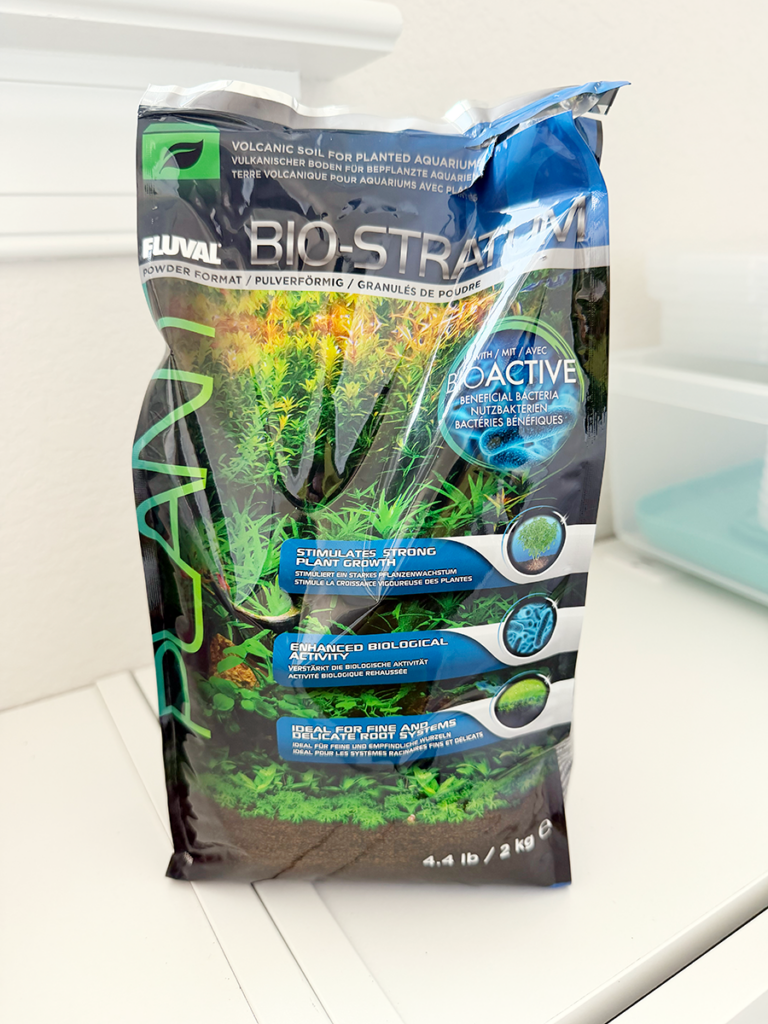 Fluval Stratum is a porous, volcanic soil substrate made by, you guessed it, volcanoes. Stratum is originally made for aquarium plants because it’s lightweight, holds moisture well, and still allows for airflow — which also happens to be perfect for rooting leaf cuttings. Too much moisture and no airflow, and you’re looking at rot. Too little moisture, and your cutting dries out before it has a chance to root.